Today’s Post by Joe Farace
“You don’t buy black lingerie unless you want someone to see it.” — Bianca Stratford
One of the approaches that I use to do to get myself out of a photographic rut is to shoot a few glamour portraits in direct monochrome mode, not every image I make, just some of them. If you would like to try this technique, it doesn’t have to be—and shouldn’t be—all of the images you make during a session; maybe just a few to, you know, see what happens.
“everything looks worse in black and white”—Paul Simon
 I love Paul Simon’s music but I think he was wrong in the above quote from his song Kodachrome. Maybe he just needed to see this portrait of the always amazing Pam Simpson.
As an alternative to shooting in direct monochrome mode, you may decide to shoot RAW and convert the image file to black & white later in Photoshop, there are some differences and advantages to that approach.
For creating black and while images, like this glamour photography portrait, the biggest advantage of first shooting in color is that most of the retouching tools I use, including ]Imagenomic’s’ Portraiture, work better with color files than with 256-color monochrome images. Retouching tip: To avoid plasticky looking skin tones when using Portraiture, you should apply its retouching to a separate layer, then use Photoshop’s Opacity menu to gradually lower the opacity of the retouched layer until you start to see actual skin tones peeking through from the bottom or background layer.
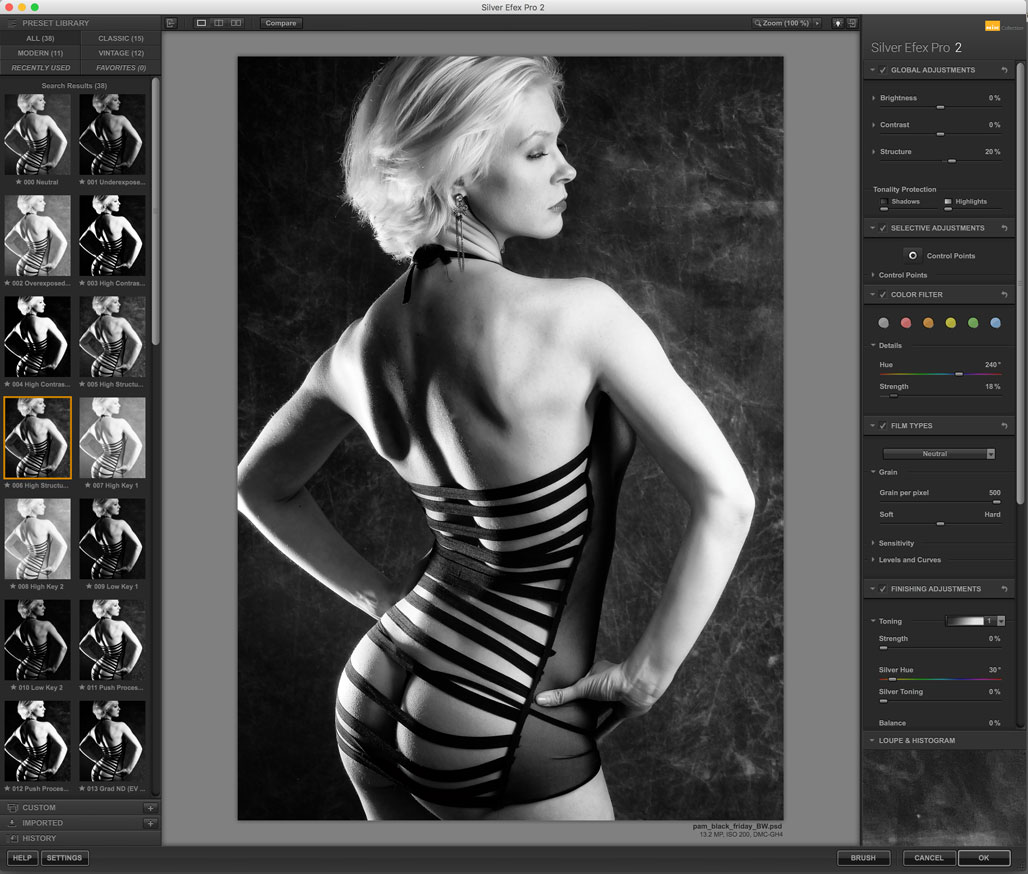
 How I Made this Portrait: When shooting boudoir or intimate portraiture I sometimes preferred working in black and white to produce what I like to think is a more dramatic look. More recently I’ve preferred capturing these kinds of images in color, as with today’s featured image, but converting them to black and white using Silver Efex, in this case, I used their High Structure (smooth) preset along with the plug-in’s blue filter lightly engaged.
The lighting setup for this portrait of Pam Simpson started with a Godox QT600IIM monolight with a Westcott Apollo Strip soft box attached used as the main light and placed at camera right. The soft box’s flexible framework uses an umbrella-style construction so it’s compatible with many kinds of lighting systems. Side lighting came from another Godox monolight that was placed at camera left with its standard metal reflector in place. The backdrop used was a two-sided Savage Monsoon (this is the darker side) collapsible background that was hung on a lightstand. The camera used was a Panasonic Lumix GH4 with Leica DG Macro-Elmarit 45mm f/2.8 lens a beautiful, but pricey lens. (I bought mine used.) The exposure was 1/125 sec and f/8 and ISO 200.
I’ve been using Micro Four-thirds cameras for all of my studio portraits since my friend Mark Toal introduced me to the Panasonic Lumix system many years ago, although I’ve also embraced Olympus cameras and lenses as well and use a mix-and-match approach for my mirrorless

If you enjoyed today’s blog post and would like to treat me to a cup of Earl Grey tea ($2.50), please click here. And if you do, thanks so much.
My book Creative Digital Monochrome Effects has a chapter on IR photography and is available new from Amazon for $11.46 with used copies starting around eight bucks as I write this.