Today is #anythingcanhappenday on the Blog. It’s also New Year’s Day, one of the most celebrated holidays of the year! Last year I expanded the number of portrait-related posts appearing on Thursday and based on an increased number of page views, people seem to enjoy them, so my plans are to continue that trend in 2026.
Today’s Post by Joe Farace
And now we welcome the new year. Full of things that have never been.—Rainer Maria Rilke
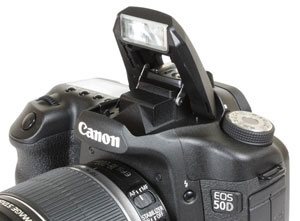
These days, many but not all, DSLRs and mirrorless cameras have a built-in flash. That’s not necessarily true for so-called Professional models—the Lumix GH4 being an exception—even though having a small flash available with the click of a button can make the difference between a good photograph and a not-too-good one. Here’s why.
A New Year, A New Life
When photographing a static subject, sometimes the best way to get a properly exposed photograph is not to use flash but instead place your camera on a tripod and use the available light. Another alternative, if you don’t own a tripod, is to kick up the ISO setting but if any digital noise starts looking like grapefruits, your next best choice might be using flash, unless…
…you have a DSLR or mirrorless camera body that has five or more stops of built-in image stabilization but there are still lots of reasons for you to use flash. So you might ask: When should you use the built-in flash?

How I made this portrait: My former muse Tia Stoneman was eight months pregnant when I photographed her in the kitchen on my former home. There was plenty of available light from the North-facing bay window but I needed to use the Canon EOS 50D’s built-in flash for fill. Since there was so much light coming through the windows, Tia would have been a silhouette without the flash. The lens used was the EF 28-135mm f/3.5-5.6 IS USM at 53mm with an exposure was 1/125 sec at f/5 and ISO 800.
Using a camera’s built-in flash as the sole source of lighting for photographing people indoors inevitably produces lighting that may be flat and contrasty. Nevertheless the tiny flashes that are found in digital cameras do a surprisingly good job of delivering well exposed pictures if you don’t exceed their maximum flash distance. Hint: Read the manual to find out what that is.
 A better way to use your built-in flash indoors is when there’s enough ambient light for the flash to serve as fill. The flash illuminates your subject and focuses the viewer’s attention on them. When you have too much ambient light indoors flash can be the best way to control contrast and add some dimension to the photograph. Without flash, all you may get is a silhouette as would have been the case of the above portrait of Tia.
The downside of using built in flash is that it’s so close to the lens it can produce shadows from the subject onto a nearby wall as happened here as you can see with the subject’s left arm. The solution, if you have enough room, is to move the subject far enough away from the wall so that shadows from the flash fall behind them. One rule is the subject’s distance from a wall should be equal to their height but that rule wouldn’t work in my cramped kitchen so I had to live with the shadows.
 If you enjoyed today’s blog post and would like to treat me to a cup of Earl Grey tea ($2.50), please click here. And if you do, thanks so much.
My book Joe Farace’s Glamour Photography is full of tips, tools and techniques for glamour and boudoir photography and includes information on all of the cameras used as well as the complete exposure data for each image. New books are available for $22.26 with used copies available from Amazon starting around ten bucks.as I write this. Kindle version is $19.99 for those preferring a digital format.