Today’s Post by Joe Farace
 In 1952, Lester A. Dine invented the ring light to make dental photos but today people use them for all kinds of other photography too.
A ring light is a circular light source that surrounds the optical axis of a lens causing light to hit the subject from different angles, producing soft shadows in a manner similar to a softbox. When photographing people, the unique way a ring light renders light also produces a shadowy halo around the subject that’s much beloved by fashion photographers. I use a small ring flash to photograph butterflies but if you want to photograph people, to paraphrase Jaws Chief Brody, “You’re gonna need a bigger light.”
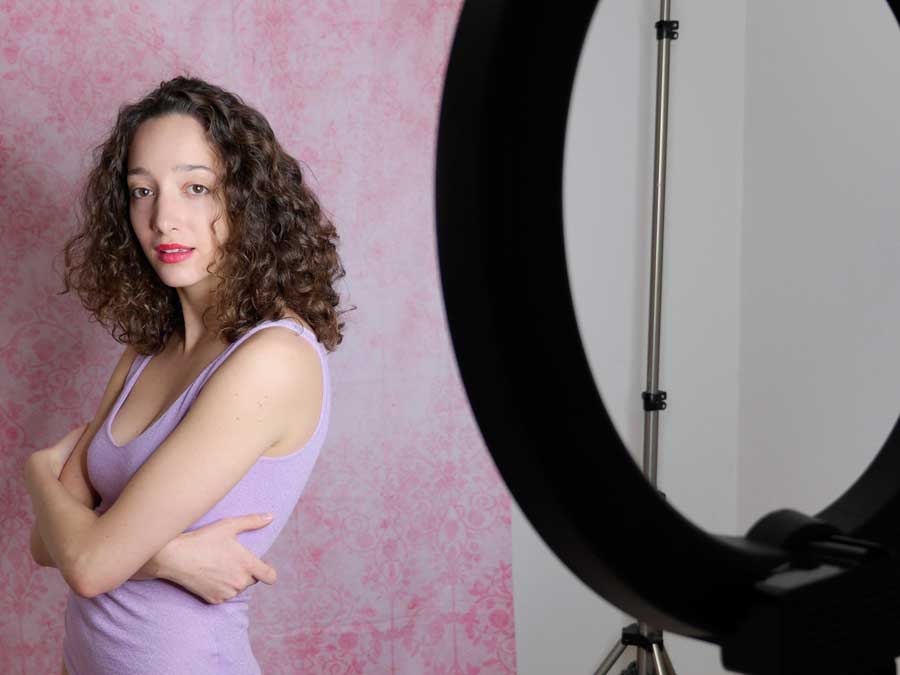
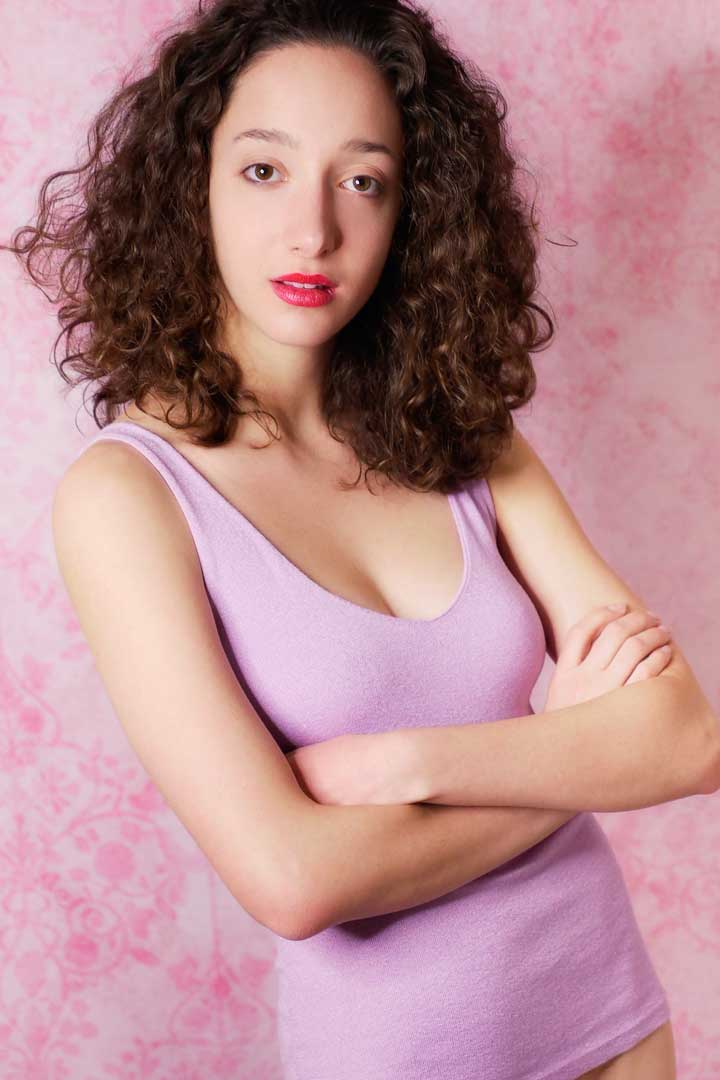
 I made this portrait of aspiring model Laura May Bachmayer using Flashpoint’s 13-inch Fluorescent Dimmable Ring Light. But there are other similar ring lights available from all kinds of sources, many of them using fluorescent lighting. Why? Fluorescent lighting closely matches a camera’s imaging chip’s RGB spikes more than tungsten sources that end up producing 93% heat and 7% red light. As with all continuous lighting sources you can use your camera’s built-in light meter to measure exposure. So using the Flashpoint (or similar light) is a good way to get started with ring lights without spending the kind of money that ring flash units typically cost. The Canon MR-14EX II Macro Ring Lite, for example, is $549 compared to the Flashpoint’s $39.95.
How I made this shot: For Laura’s portrait, I put my mirrorless camera in Program mode, letting the camera determine aperture and shutter speeds and tweaked with the camera’s exposure compensation control when required. With the ring light placed at camera right, as shown in the setup photo above, it produced more modeling and less flat-looking light thank sticking the camera’s lens in the “ring” and because placement was just slightly off-axis, the subject’s eyes retained some of the ring light’s classic circular catchlights. The camera used was a Panasonic Lumix GH3 with a borrowed Lumix G Vario 12-35mm f/2.8 lens (at 35mm) with an exposure of 1/40 sec at f/3.2 and ISO 640
My final exposure may have been a bit overexposed, so I applied the inverse of the technique I use for underexposed subjects using the multiply command instead of “screen” from the Layer’s palette’s Blending Mode menu. Tip: This trick doesn’t work all that great for really overexposed subjects because image data is lost during overexposure. The JPEG file (this was before I went all in on RAW+JPEG) was tweaked in Imagenomics’ Portraiture before adding softness from Color Efex Pro’s Glamour Glow filter.
If you have any questions about these high ISO’s used for these kinds of continuous light portraits, please check out my post, “Why Such High ISO’s for my LED Portraits?” And while this portrait was not made using an LED light source but I’ve had similar experiences when working with other continuous lighting sources.
 If you enjoyed today’s blog post and would like to treat Joe to a cup of Earl Grey tea ($2.50,) click here. And if you do, many thanks.
If you’re interested in shooting portraits and learning how I use cameras, lenses and lighting in my in-home studio or on location, please pick up a copy of Studio Lighting Anywhere that’s available from Amazon.com with new copies selling for $32.48. Used copies start around seven bucks as I write this, which is a good deal for all of the useful information found in the book. The Kindle edition is $19.99 for those preferring a digital format.