Today’s Post by Joe Farace
One of the advantages that digital imaging has over shooting with film is the different ways that it lets you sharpen images. Most image editing programs contain a Sharpen command that works by raising the contrast of adjacent or edge pixels but sometimes this technique increases sharpness at the expense of increasing contrast too. While some photographs can handle additional contrast before loosing highlight detail, others cannot
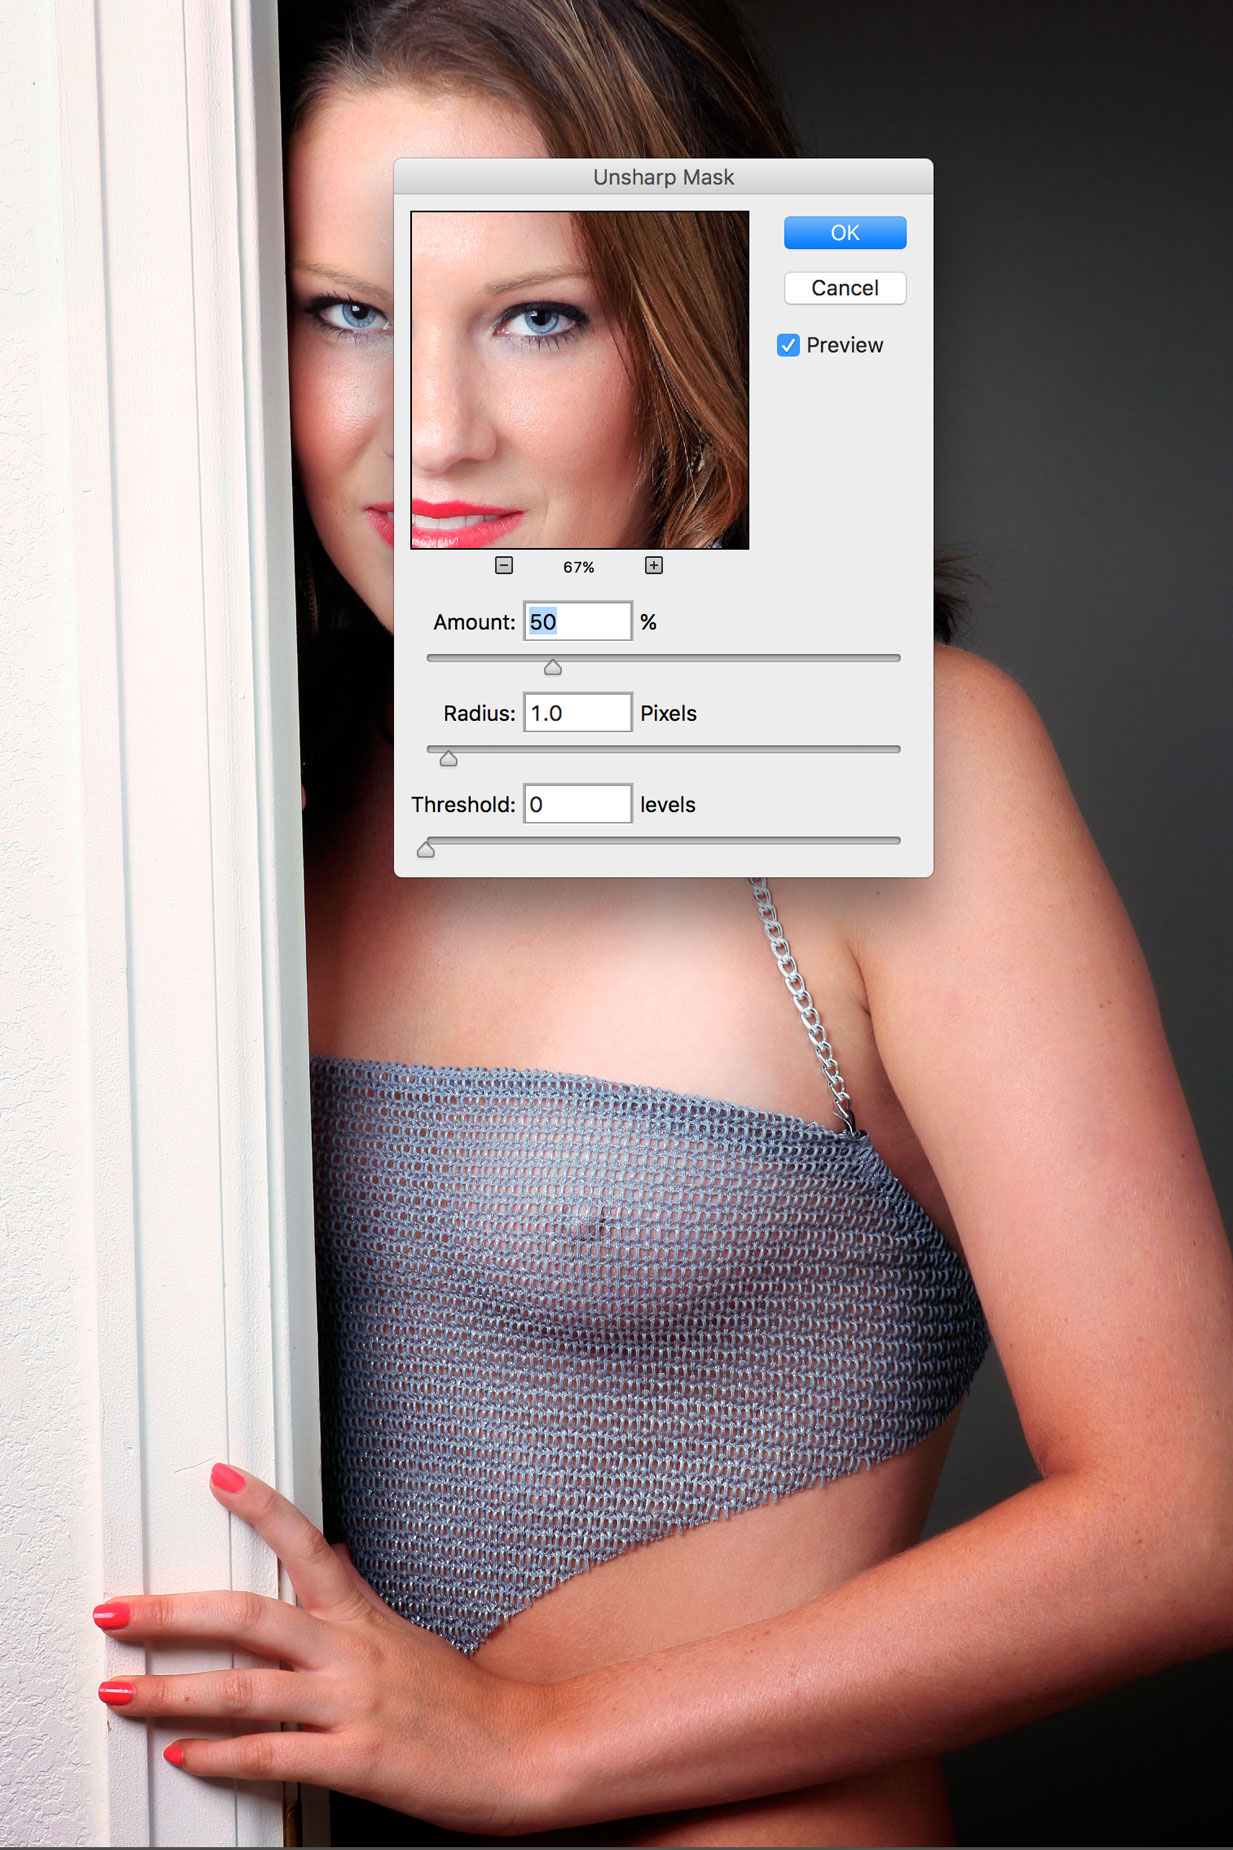
 Instead of using the Sharpen command a better way to increase an image file’s sharpness might be using the Unsharp Mask (Filter > Sharpen > Unsharp Mask) command that’s found in Photoshop and some other image editing programs.
Photoshop’s Unsharp Mask dialog box has three sliders that let you control the amount of sharpness that’s applied:
- The Amount slider controls the percentage of sharpening. Don’t be afraid to apply more than 100 percent to high resolution files but low res images can fall apart if larger amounts are used.
- The Radius value will vary depending on subject matter, final reproduction size and output. For high-res images, a Radius value between one and two is typical. Lower values only sharpen the edge pixels, whereas a higher value sharpens a wider band of pixels.
- The Threshold slider lets you determine how different the sharpened pixels are from the surrounding area before being considered edge pixels. Using a threshold of four affects all pixels with tonal values that differ by four or more. If adjacent pixels have tonal values of 128 and 129, for example, they’re not affected.
Tip: Here’s a technique you can use to deal with any color fringing that sometimes occurs when applying Unsharp Mask. After sharpening the image, go to the Fade command (Edit > Fade Unsharp Mask) that appears after a filter is applied. Don’t change the Opacity setting—leave it at 100%—but select Luminosity from the pop-up menu. Any glaring color artifacts should be gone.
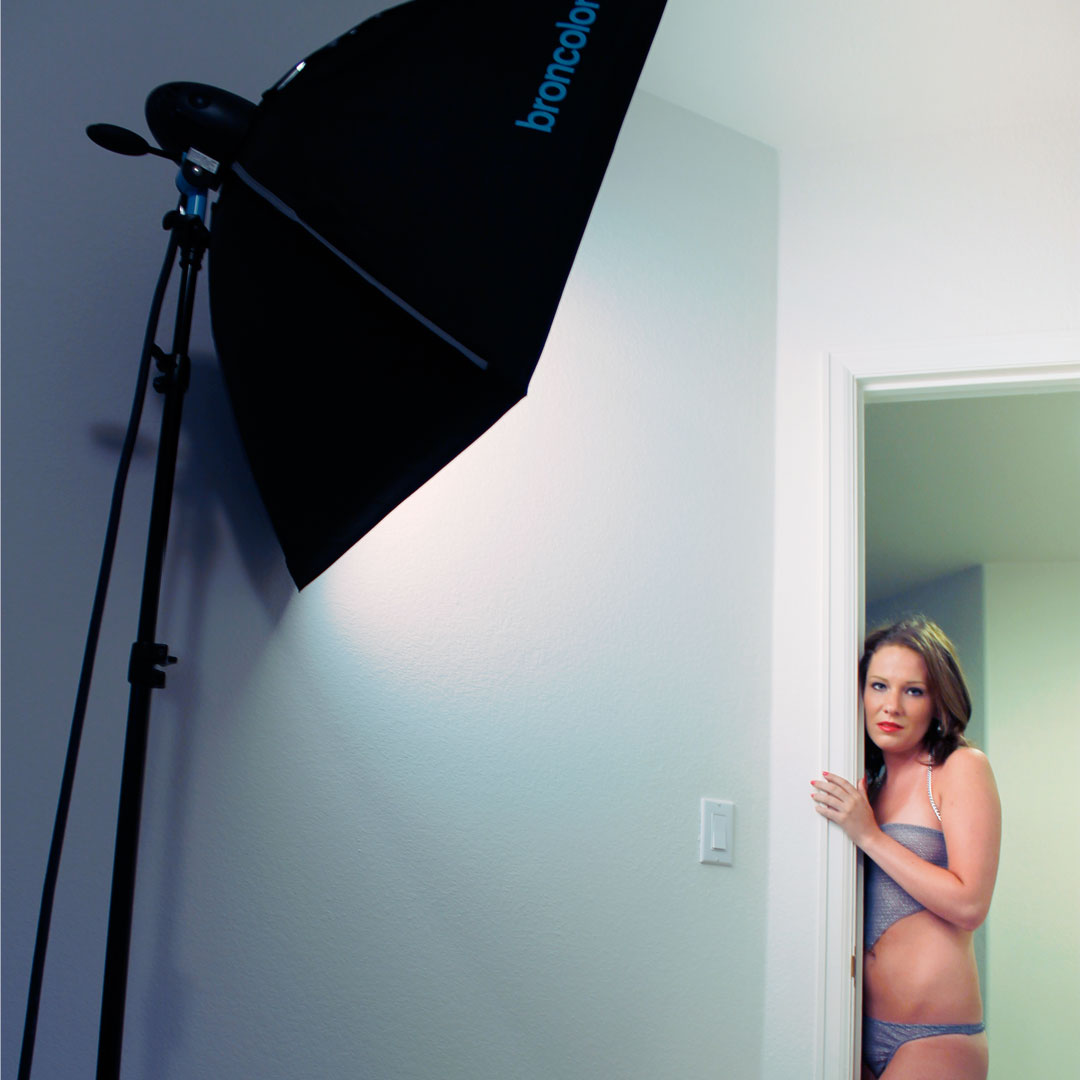
 How I Made This Shot: The portrait of Colleen Breanne (at right) was made while she was posing in the doorway to my home studio. It was shot with only a single Broncolor head with 28-inch softbox attached and placed at camera left. No reflectors were used,
The photograph was made with a Canon EOS ID Mark IIN and my favorite EF 135mm f/2.8 SF lens with an exposure of 1/60 sec at f/10 and ISO 100. (The soft focus setting was zero.) The image file was retouched using my standard techniques with some light burning and dodging created by using the layers produced by PhotoKit 2 and topped off with a light sprinkling of the Glamour Glow filter that’s part of Color Efex.
 If you enjoyed today’s post and would like to support this blog, you can help by making a contribution via Patreon, where memberships start at just $1.25 a month, with additional levels of support at $2.50 and $5 that includes special benefits. And if you do, I would like to thank you for your support.
If you’re interested in learning how I use cameras, lenses and lighting in my in-home studio and on location, please pick up a copy of Studio Lighting Anywhere which is available new from Amazon.com for $34.95 or used starting around twenty bucks, as I write this. The Kindle version is $19.99 for those preferring a digital format.