Today’s Post by Joe Farace
I have a confession to make. Not all of the portraits you see on this blog (or in my books) come from a single image file. Sometimes, maybe about 2-3% of the time, the subject’s facial expression that I like isn’t on the the pose that I like. Typically I make several variations on the same scene using a technique I call shooting through a pose, either zooming the lens or just zooming my body to arrive at the final cropping. If you missed my take on cropping, you can read about it in my post “My Approach to Cropping.”

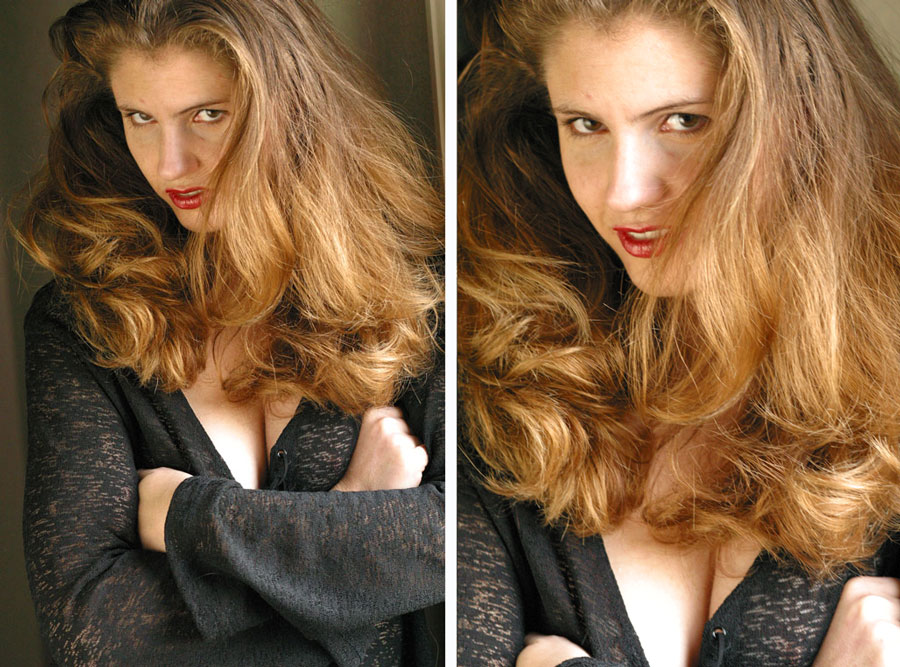
How I made this shot: I photographed Kim Goetz with window light in my former home with an inexpensive ($30) 30-Inch 5-In-1 Westcott reflector placed at camera left for fill. I used a Canon EOS 60D and EF 85mm f/1.8 (my favorite lens for available light and LED portraiture) along with a final exposure, for both shots, of 1/60 sec at f/5 and ISO 1000.
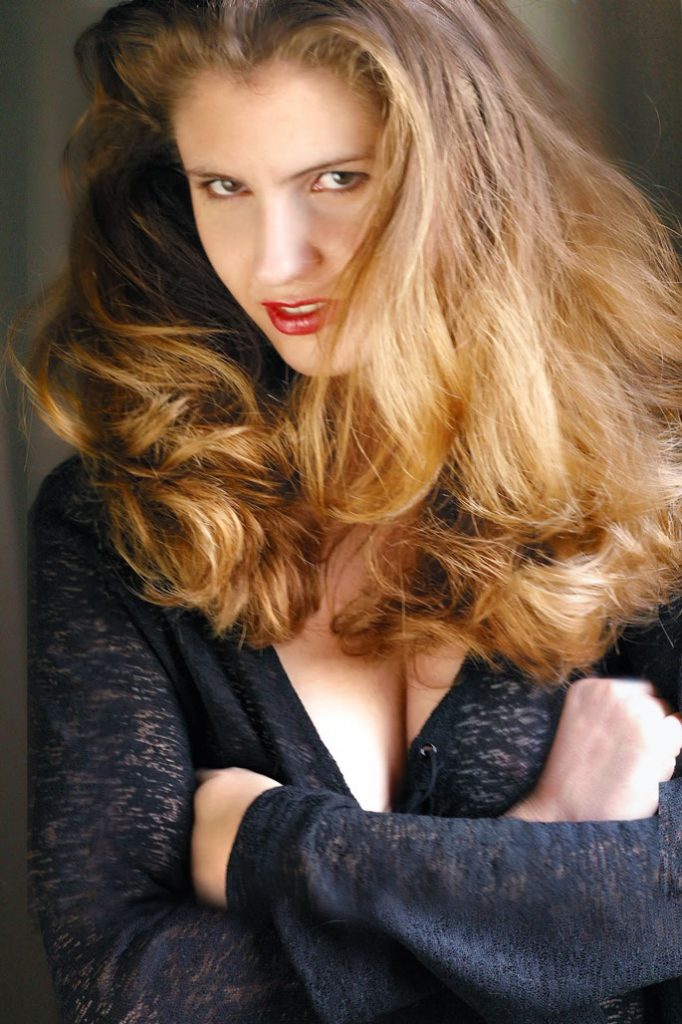
I liked Kim’s body position and the image’s overall cropping of the left-hand image but didn’t care for her expression. A few frames later I made the right-hand shot but it felt cramped and I preferred the looser copping of the other image. What to do? Cut and Paste.
I opened the files in Photoshop. Working first with the right-hand image, I used the Rectangular Selection tool to select an area around her face. Tip: If you try this, make the selection a little bigger than you think you might need.
 Then I pasted the selection onto the left-hand image. I used the Zoom tool and set the pasted layer’s opacity at 50% and then resized the top layer to get it to match the size and shape of the bottom layer. This may take several tries so be patient, gradually resizing and moving until it’s perfect. Tip: I start with the eyes as a reference.
After the two layers match I increase the opacity to 100%. Then I used the Eraser tool with a soft-edged brunch to gently erase the edges of the selection blending top and bottom layers. When you’ve got it where you like it, flatten the layers. Next I retouched the portrait using a lot of the tools I mention here on this blog, plus Dfine to reduce noise because the images were shot at ISO 1000.
A special note: It’s a important for you to understand that my portrait of Kim is not journalism, photojournalism, documentary photography or the news. Portraits are, as Richard Avedon one said, “a picture of somebody having their photograph made.” And since Daguerre, people have retouched and manipulated portraits to create an idealized version of the subject and so I did.
 If you enjoyed today’s blog post and would like to buy Joe a cup of Earl Grey tea ($2.50), click here. And if you do, thanks so much.
Joe Farace’s Glamour Photography is full of tips, tools and techniques for glamour and boudoir photography with new copies available from Amazon for $1982, as I write this. Used copies start at the giveaway price of $7.50. The Kindle version is $11.99 for those who prefer a digital format.