On the third Monday in February, the United States celebrates the holiday known as Presidents Day. The day takes place during the birth month of the country’s two most prominent presidents, George Washington and Abraham Lincoln.
Today’s Post by Joe Farace
“Talent is cheaper than table salt. What separates the talented individual from the successful one is a lot of hard work.”—Stephen King“Hard work beats talent”—Mat Armstrong
I once received an e-mail from a Shutterbug reader asking, “why do you do infrared photography, when regular photography is already so hard?” The short answer is because it’s fun but more than that, it lets you create unique images that have a look unobtainable by any other means, including software.. And because IR photography captures light that’s invisible to your eyes it can be challenging to capture images but so can any genre in photography you haven’t tried before.
It’s Invisible Light
We humans typically see a range of light in wavelengths ranging from 400 to 700 nanometers. A nanometer (or nm) is a metric unit of length that’s equal to one billionth of a meter. A digital camera’s sensor typically sees light in wavelengths from 350 to 1,000nm. Many DSLRs and mirrorless cameras have a low pass filter installed directly in front of the sensor that blocks infrared and Ultraviolet light from passing through to the sensor, preventing them from polluting a photograph’s color.
In recent year. there’s a trend to remove or not install these low pass aka anti-aliasing filters in cameras allowing them to capture sharper images with more fine detail. Why put one in in the first place? Beside color pollution, removing this filter can lead to increased moiré patterns in your images but Life Pixel says, “Pretty much every image post processing software now includes moiré removal tools making it quite simple to remove…” when capturing in RAW. I have never personally encountered moiré in an image when shooting all kinds of digital cameras, some with and many without an anti-aliasing filter. That’s just me and the kind of photographs I make. You may or may not encounter moiré in the kind of images you make, so as Sergeant Phil Esterhaus used to say, “Let’s be careful out there.”

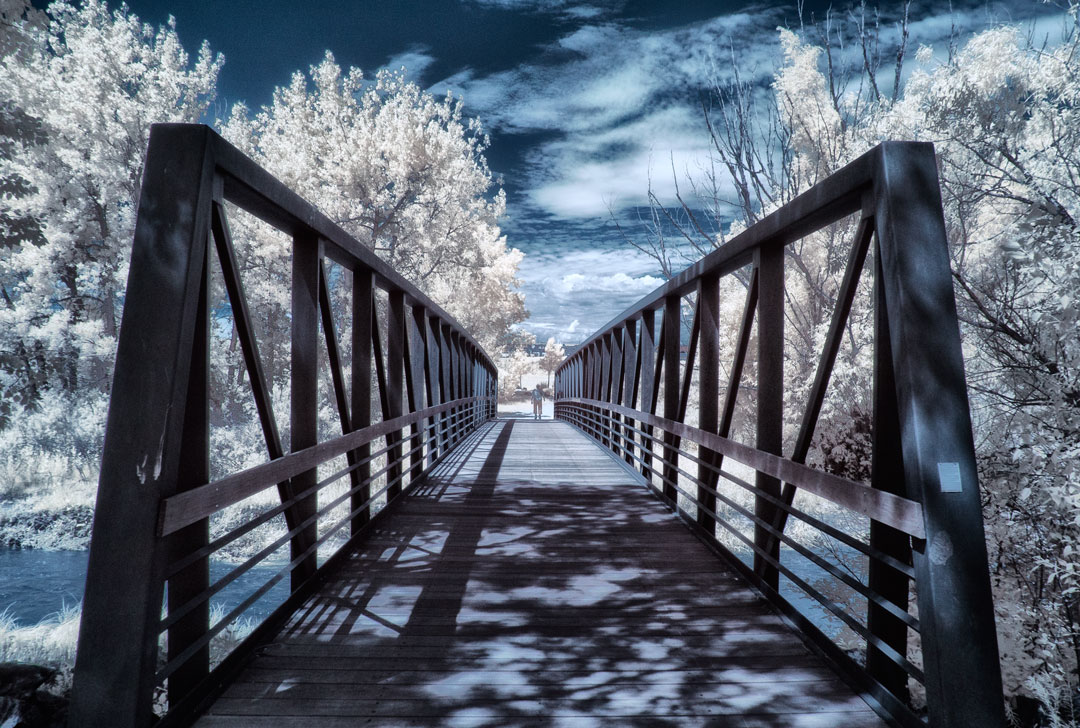
How I made this photo: The Oxford Languages Dictionary says that monochrome is “a photograph or picture developed or executed in black and white or in varying tones of only one color.” In this case, it’s blue. This photograph of a foot bridge in McCabe Meadows was shot with a Panasonic Lumix G6 that was converted to infrared capture by Life Pixel using their Enhanced IR filter (665nm filter.) The lens used was the infamous Lumix 12-32mm f/3.5-5.6 lens (at 12mm) with an exposure of 1/250 sec at f/11 and ISO 400. The RAW file was processed using the Blue Sky techniques that’s explained in this post.
Back to the Low Pass Filter…
When you have your camera modified for IR-only capture, the low pass filter is removed from the sensor and replaced with an optical glass filter that only permits light of specific wavelengths to pass through to the sensor. There are many companies that do this kind of conversion. I’ve found that Life Pixel does a great job with IR conversions and they’ve done conversions on my Canon DSLRs and Panasonic Lumix G-series cameras. This is not a paid or sponsored endorsement, just my experience. Depending on the kind of effects you want to achieve, the company offers several different filter options. This is why, I guess, I have three different Lumix cameras converted using three different kinds of filters but it may also have something to do with my being obsessive about certain things.
For the above image, the Enhanced IR filter installed on my 16-megapixel Panasonic Lumix G6 allows more color to pass through to the sensor making it especially suited for color IR photography allowing for greater saturation and color range. This filter also lets you create black and white or toned monochrome although with a bit less contrast but that’s easily adjusted in Photoshop or your favorite image enhancement program.
If you would like to experience the same thrill of discovery that occurred during the first phase of your photographic education, my suggestion is that you never stop exploring. Try some new things. Maybe it’s infrared photography, maybe not but whatever you do try something that’s outside your normal comfort zone.
PS: To find many different posts about “infrared.” , pPl\ease use the search function on this blog (in the upper right hand corner.) If you spend a few minutes perusing them it will help take some of the mystery out of shooting IR imagery.
