Today’s Post by Joe Farace
“Talent is cheaper than table salt. What separates the talented individual from the successful one is a lot of hard work.”—Stephen King
You might consider this a follow-up to yesterday’s blog post….
I once received an e-mail from a Shutterbug reader asking, “why do you do infrared photography, when regular photography is already so hard?” The short answer is because it’s fun. And yes, because IR photography captures light that’s invisible to your eyes it can be challenging to capture images but so can any genre in photography that you haven’t tried before.
Your eyes typically see a range of light from approximately 400 to 700 nanometers. (A nanometer or nm is a metric unit of length equal to one billionth of a meter.) A digital camera’s sensor sees light in wavelengths from 350 to 1,000nm. Most DSLRs and mirrorless cameras have a low pass filter located directly in front of the sensor allowing low frequency light that’s visible to the human eye pass through to the sensor. At the same time, this filter blocks unwanted light from the infrared and ultraviolet spectrums, preventing them from polluting a photograph’s color.

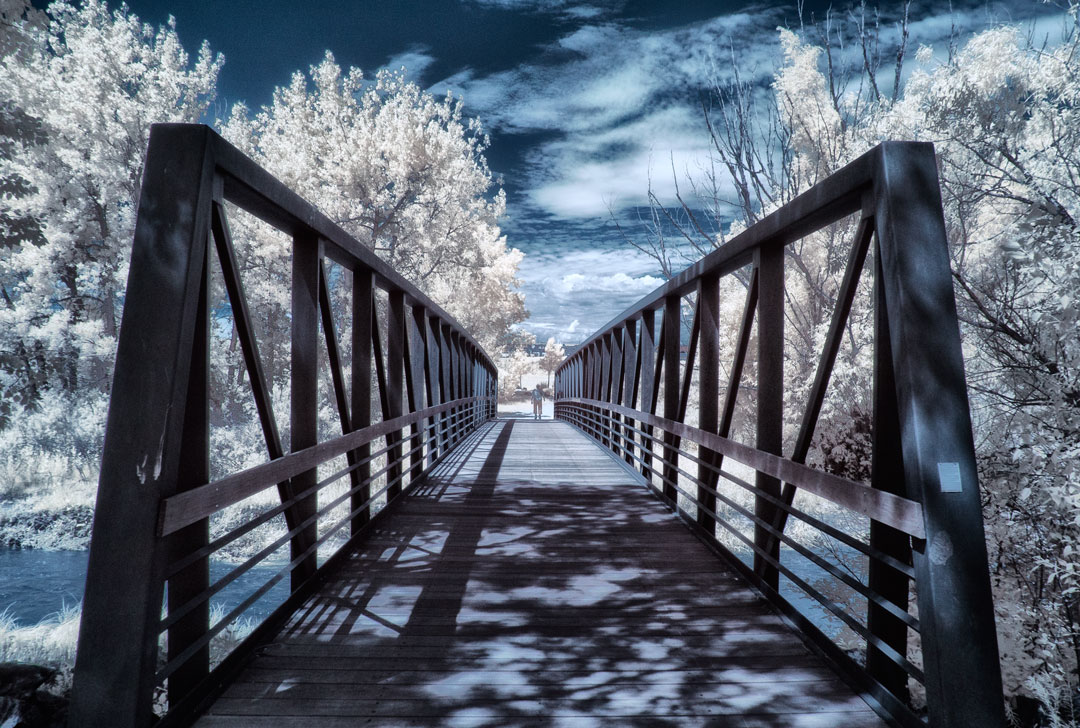
How I made this photo: This photograph of a small bridge in McCabe Meadows was shot with Panasonic Lumix G6 that was converted to infrared capture by Life Pixel using their Enhanced IR filter (equivalent to 665nm filter.) Lens used was a Lumix 12-32mm f/3.5-5.6 lens (at 12mm) with an exposure of 1/250 sec at f/11 and ISO 400. The RAW file was processed using the Blue Sky techniques that’s explained in this post.
When you have your camera modified for IR-only capture, the low pass filter is removed replacing it with a an optical glass filter that only permits light of specific wavelengths to pass through to the sensor. LifePixel, for example, offers several different filter options. depending on the kind of effects you want to achieve. (This is why, I guess, I have three different Lumix cameras converted with three different filters.) For the above image, the Enhanced IR filter installed on my Lumix G6 allows more color to pass and is especially suited for color IR photography allowing for greater saturation and color range. Black & White or toned monochrome with this filter looks good too although with a bit less contrast—without making any adjustments.
If you would like to experience some of the same thrill of discovery that occurred during the first phase of your photographic education, my suggestion is that you never stop exploring. Try some new things. Maybe it’s infrared photography but whatever you do try something that’s outside your normal comfort zone.
Please use the search function on this blog (in the upper right hand corner) to find posts about “infrared” and spend a few minutes perusing them it will help take some of the mystery out of shooting IR imagery.
Life Pixel does a great job with IR conversions and have done most of my Canon DSLRs and all of my Panasonic Lumix G-series cameras. This is not a paid or sponsored endorsement, just my experience.
My book, The Complete Guide to Digital Infrared Photography is available from Amazon with new copies selling for $45.09 and used copies starting around nine bucks as I write this. Creative Digital Monochrome Effects has a chapter on IR photography with new copies selling for $23.50 and used copies starting around eight bucks as I write this.