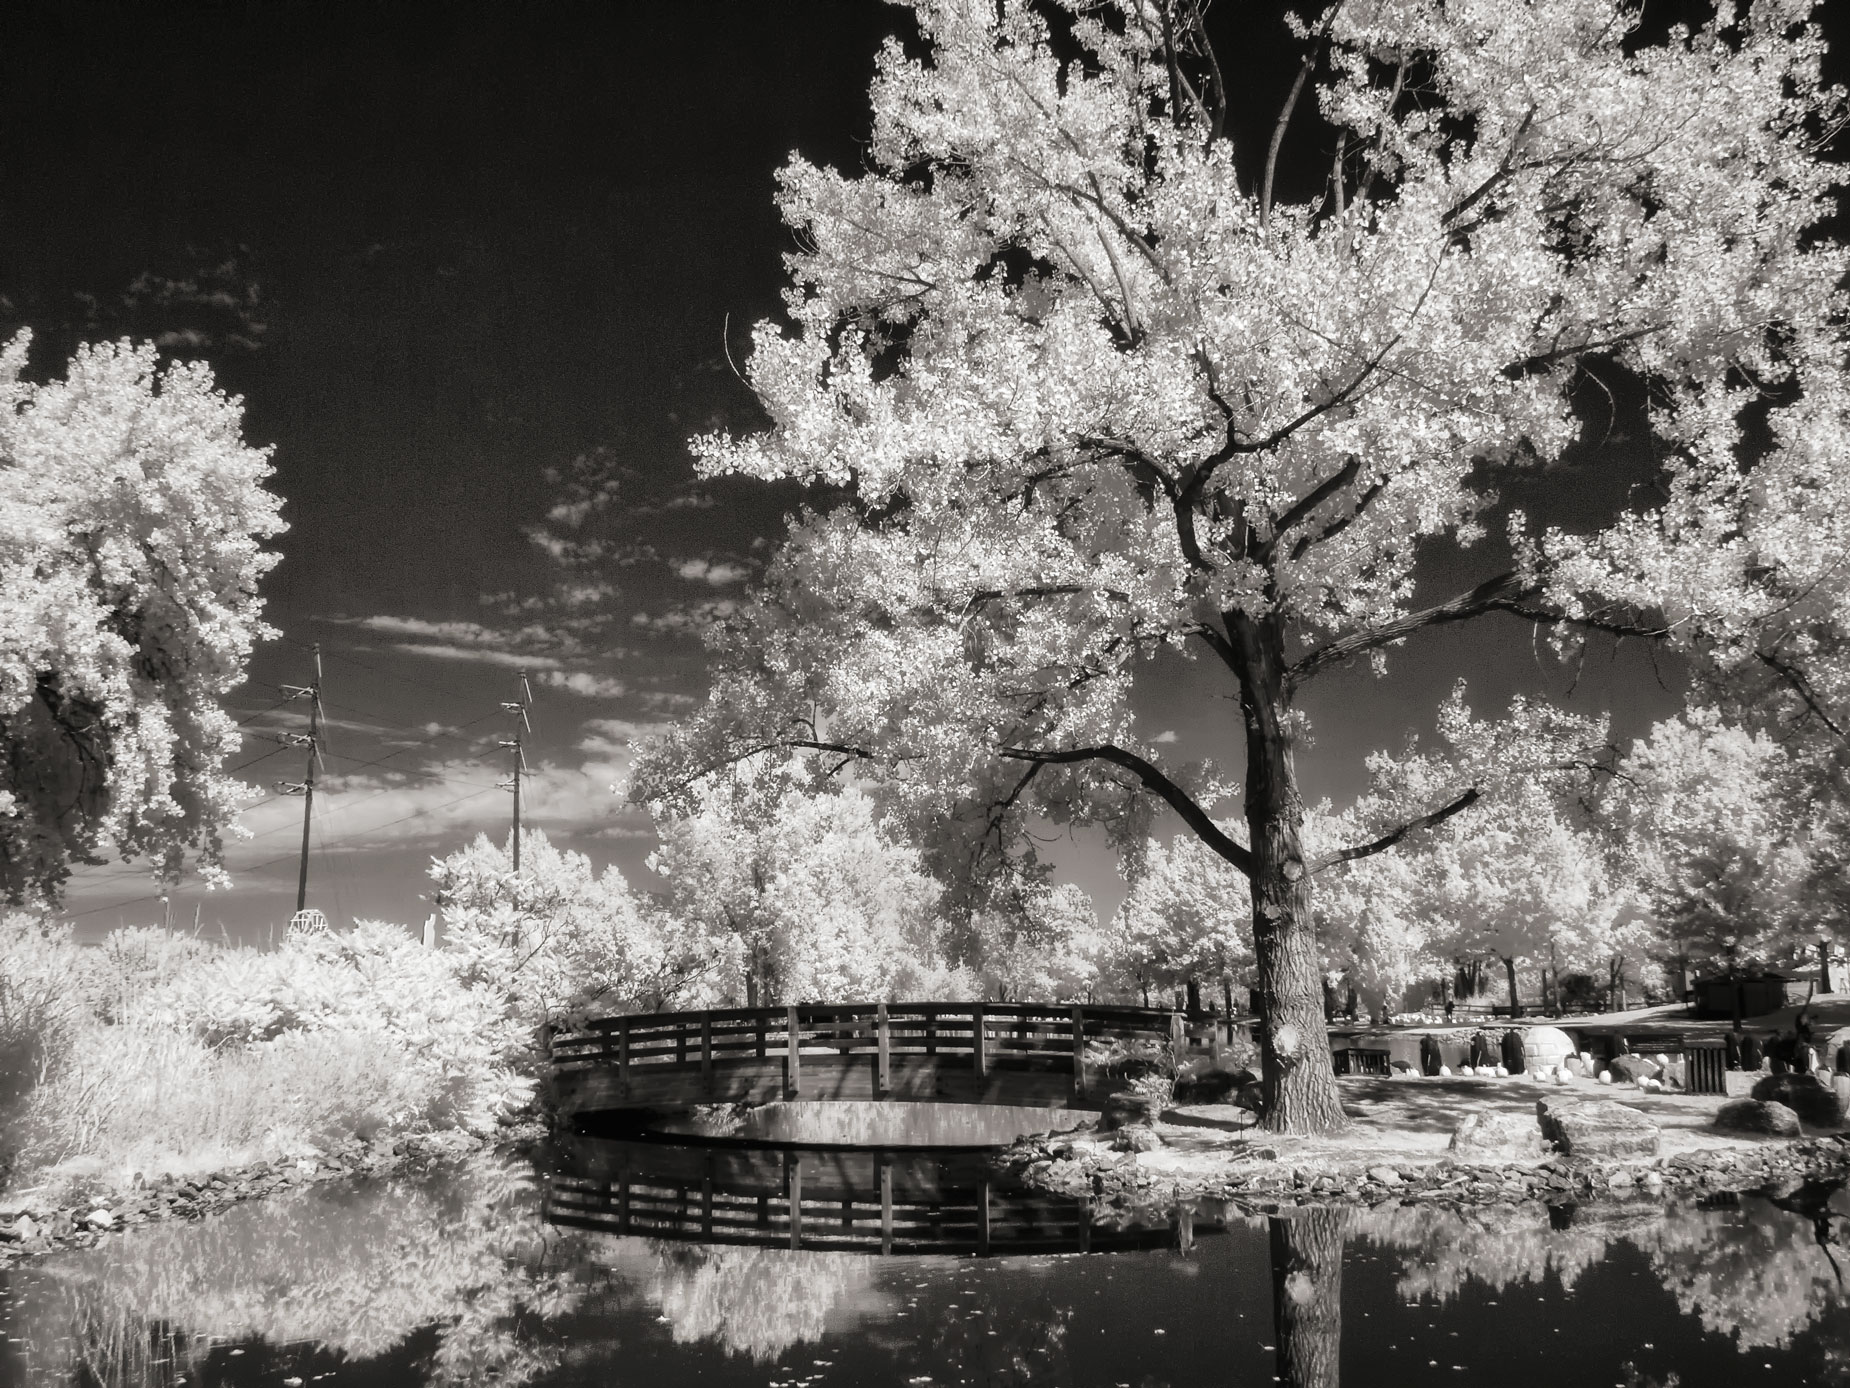
Last week I talked about infrared conversions. This week I;’m going to go in more depth about choosing the right IR conversion for you. The featured image, presented for your approval, is (somewhat) in the style of one of my early influences, Joe Clark, the Hillbilly Snapshooter. I’ll probably never be the photographer Mr. Clark (1904-1989) was but I’ll keep trying to make some nice images.
Today’s Post by Joe Farace
Nostalgia is a file that removes the rough edges from the good old days. —Doug Larson
As of right now, I own three cameras that were converted for infrared capture. I used to have four, with the fourth being a Canon EOS 50D having a Standard IR (720nm) filter from LifePixel. It produced the equivalent of shooting infrared images using a Hoya R72 Filter in front of your lens. If you want to try infrared photography, this is one of the cheapest ways to do it without spending the amount of cash required to physically modify your camera. You can read my takes on the subject in these prior (maybe older) posts: Working with Enhanced Infrared Conversions and Working with Wratten Filters and Infrared Photography.
How Many Cameras?
You might ask me, Isn’t having three different cameras for infrared capture a bit over-the-top? I guess it is and to tell the truth some days I wonder about this myself. But I have my reasons even if, to a normal person, they might not seem to make much sense. I purchased a Lumix G5 in 2011 some time after the camera was introduced. I bought it after Panasonic launched the camera at a press event I attended in Sonoma, California and liked the little camera so much I bought one for myself. After that I bought a Lumix G6, which i got at a good price after the G7 was introduced. This mean that the Lumix G5 sat on the sidelines. While I had the EOS 50D with Standard IR conversion, I was so in love with mirrorless cameras I had the G5 converted by LifePixel using their 720nm filter. I think this option is a good one if you only want to create classic black and white infrared images.

How I Made this Photograph: The above image was captured at Hudson Gardens, a botanical gardens and event venue located in Littleton, Colorado. It was shot last fall during a PhotoWalk with my pal Barry Staver, using a Panasonic Lumix G5 that had LifePixel’s Standard Infrared conversion. The lens used was an Olympus M. Zuiko 17mm f/2.8. The exposure was 1/200 sec at f/16 and ISO 400. The RAW file was processed in Silver Efex with some Glamour Glow added for additonal infrared glow. Then it was platinum toned using PhotoKit2 because I think the effect adds a warm, nostalgic feel to the photograph.
What’s My Favorite Conversion?
As my friend Rock Sammon likes to say, “It depends.” Right now I seem to be enjoying the Panasonic Lumix G6 with LifePixel’s Enhanced Color IR ( 665nm) filter. I like it because it gives me many options for post-processing. The G5 with its Standard IR filter was the first Lumix I converted at LifePixel and I’ll still shoot and may be the best choice for classic black & white infrared photography. The Lumix GX1 that has LifePixel’s Hyper Color infrared conversion —no known nanometer equivalent—has the most potential but I’m not sure I’ll be able to reach that lofty goal here in Colorado. My friend, Juan Pablo, a scientist and photographer who lives in Colombia thinks his country’s lush tropical landscape will respond well to infrared photography and I’m sure the GX1 would be in its element there,.
So do you need three or more cameras with different filter conversions? Heck, I don’t think I need all of’em but I bought them over an extended time period that was spread over a a number of years so the cost didn’t bite me in the butt all at once. At least that’s what I keep telling myself and I might be wrong. Would I do it again? Probably not, but I will say this much, it’s been fun and I expect each of these cameras to keep giving me more pleasurable PhotoWalks and infrared capture experiences..
