Today’s Post by Joe Farace
“Life isn’t about waiting for the storm to pass…It’s about learning to dance in the rain.”
―
In making infrared photographs, people will often talk about the Wood Effect. This effect is named after IR photography pioneer Robert W. Wood (1868-1955) and not the material wood, which does not, in fact, strongly reflect infrared light.
The Wood Effect refers to the bright to white reproduction of the chlorophyll layer that’s found in deciduous plants. Although the effect is most pronounced in deciduous plants—including trees, shrubs and herbaceous perennials that lose all of their leaves for part of the year—my experience has shown that evergreens, like those Ponderosa Pines here on Daisy Hill can also reflect infrared light but to a much lesser effect,
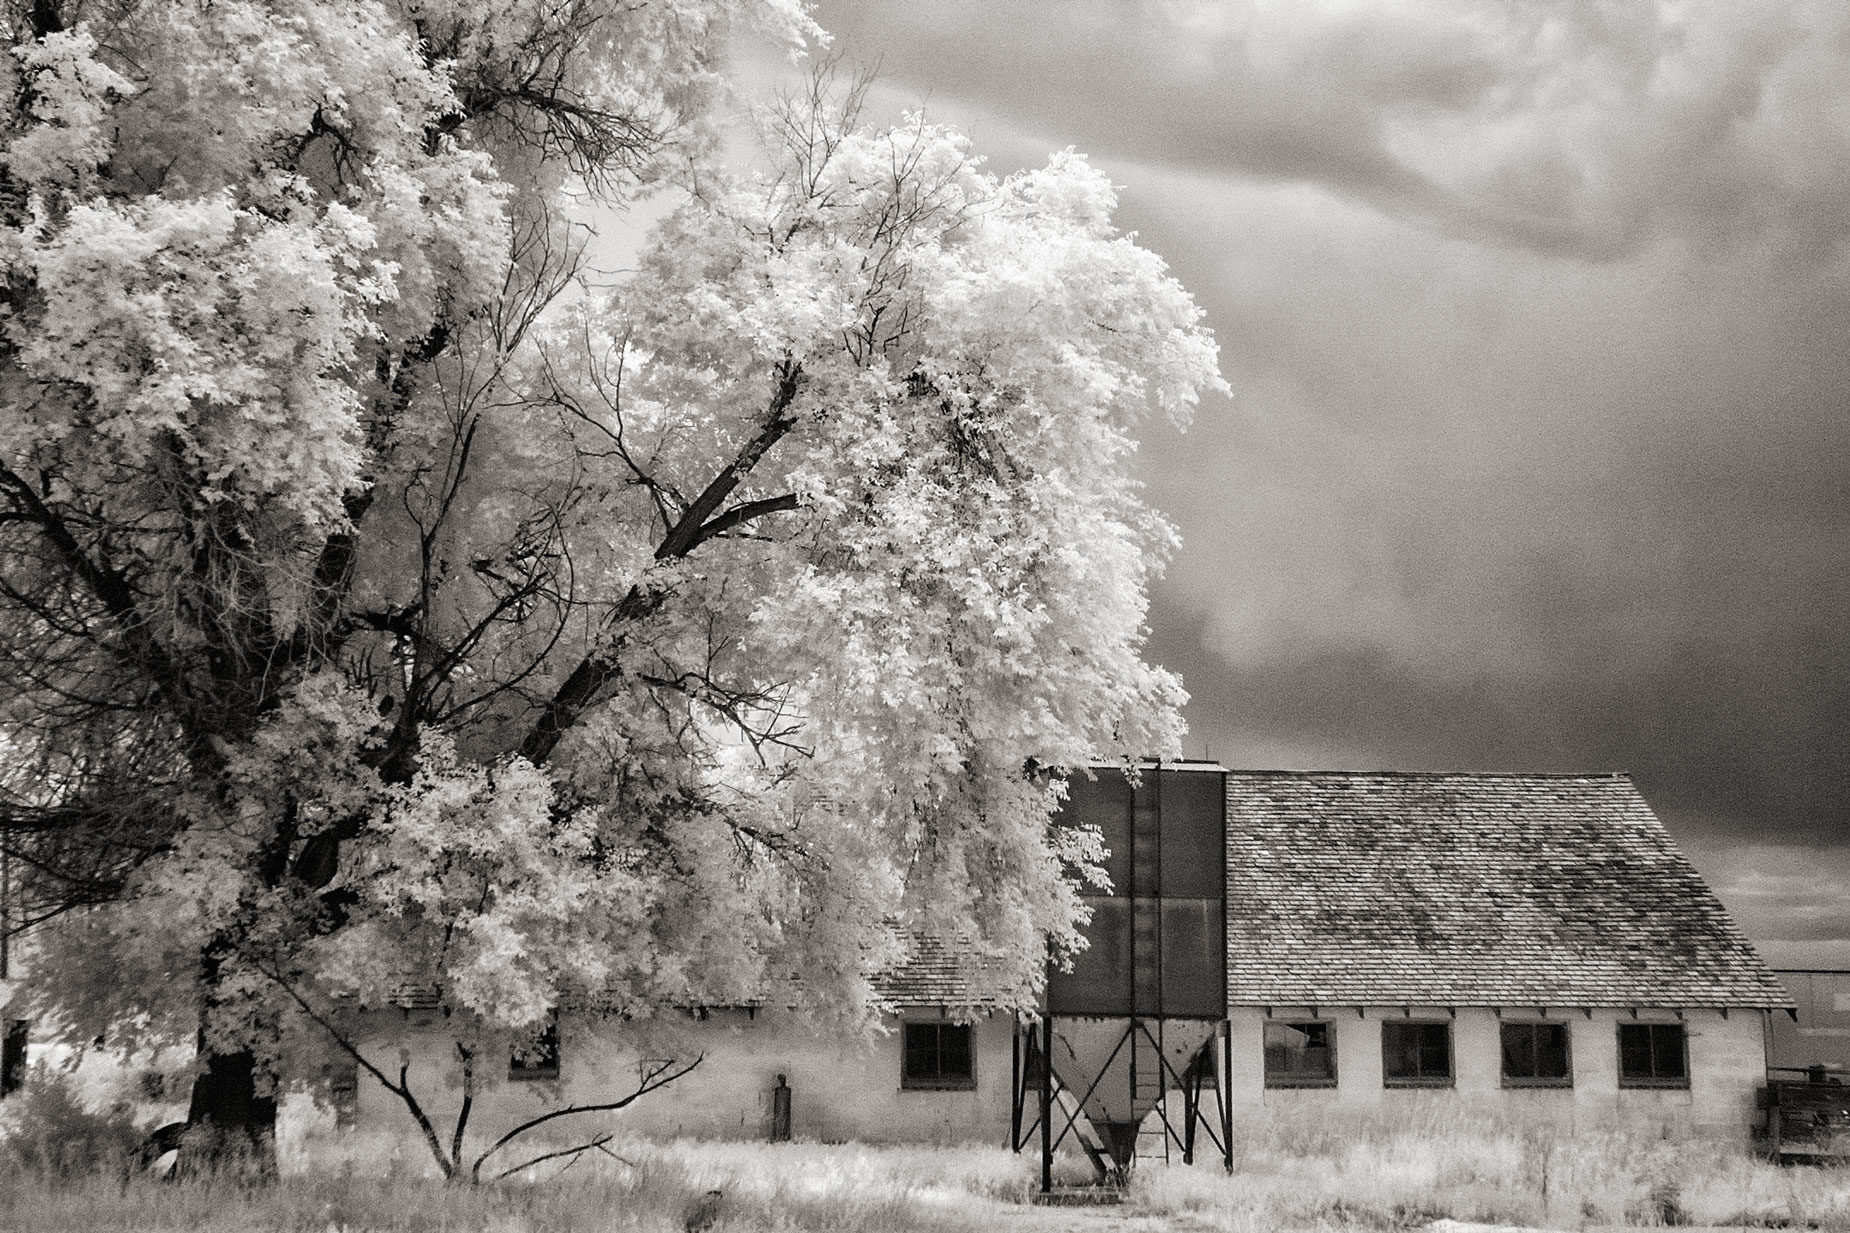
Stormy Weather
The best most infrared-looking images re usually captured at high noon under bight actinic light. (Actinic light denotes light from solar or other sources that can cause photochemical reactions such as photosynthesis.) If that’s the way to capture the best infrared images, then you may think you can’t capture infrared images on a stormy day; the photograph below shows the results that can happen when you do. I’m not a scientist but I guess the deciduous trees in today’s featured image have stored enough chlorophyll to reflect IR.
How I made this photo: The subject was a barn that was located on a farm I walked by every day back when I lived in a semi-rural community north of Denver. The photograph was made using a Canon EOS D30 that had been converted to infrared-only capture using a Standard IR (720nm) filter. The lens used was a Tamron 18-200mm f/3.5-6.3 Di II VC at 32mm. Exposure was 1/250 sec at f/10 and ISO 800.
For more about IR camera conversions please read my post Infrared Camera Conversions: What’s the Best Option? For other posts about IR photography on this blog, click on magnifying glass icon at top right and type ‘infrared.’

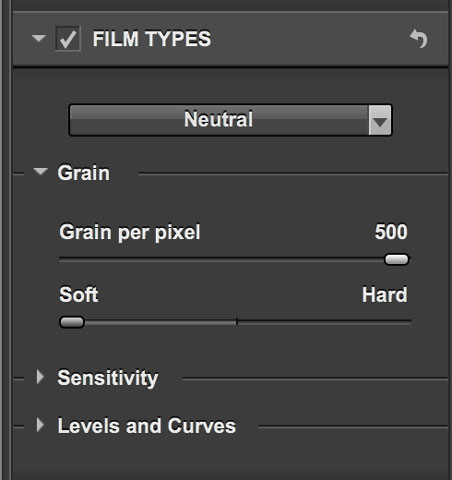
 How I processed this image file: I opened the Canon RAW (CRW) file in Adobe Photoshop, then launched Silver Efex using its Neutral preset. The image was a little noisy because of slight underexposure and I typically suppress “grain” in Silver Efex by moving its slider all the way to the left to “soft.” (at right) Then, I tweaked the image using the plugin’s Contrast, Brightness and Structure sliders before applying the Glamour Glow filter from Color Efex to take off the edge and soften the noise. I finished it off with the Platinum toning option that’s part of PixelGenius PhotoKit 2, a plug-in that does a lot more than just toning.
Photokit 2: PixelGenius closed their operations and ceased development of their products. They’ve released all of their products—PhotoKit, PhotoKit Sharpener and PhotoKit Color—as freeware without requiring serial numbers or activation.
