Today’s Post by Joe Farace
As a child, I was aware that, at night, infrared vision would reveal monsters hiding in the bedroom closet only if they were warm-blooded. But everybody knows that your average bedroom monster is reptilian and cold-blooded.—Neil DeGrasse Tyson
Whenever I write a post about infrared photography I get some interesting questions from readers. One of the most common ones I hear is that the reader’s infrared JPEG or RAW files always seem have some kind of blue or magenta tint to them. So they ask, “How do I get black and white tones in my photographs?” The good news is that accomplishing this goal is not difficult and you have, at least, three possible options: Here they are:
Your Infrared Choices
 First, if you want to have a black and white effect in camera, you should—first thing— run outside and set a custom white balance in the camera by making a photograph of the grass on your lawn or park or whatever.
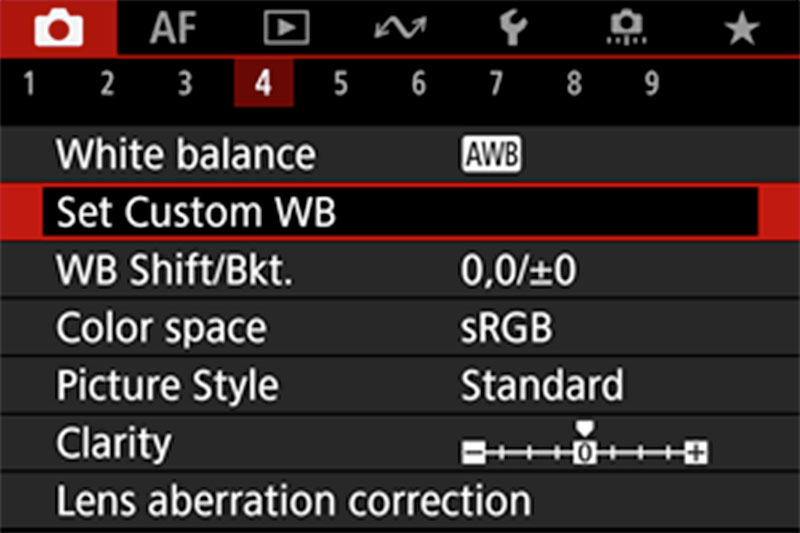
Next, select Set Custom WB (or similar, depending on the manufacturer) from the camera’s menu, which lets you pick your test image, then click OK. To see how this process works you may have to read your camera’s User’s Guide but it’s just a matter of making a photograph, pulling a few menus and pressing a button. No matter what DSLR or mirrorless camera you use, it’s easy. But keep in mind that whether you use an IR filter on your camera’s lens or have it converted for infrared capture, sometimes the results could still have a slight color shift. (Sometime you might like what you see.)

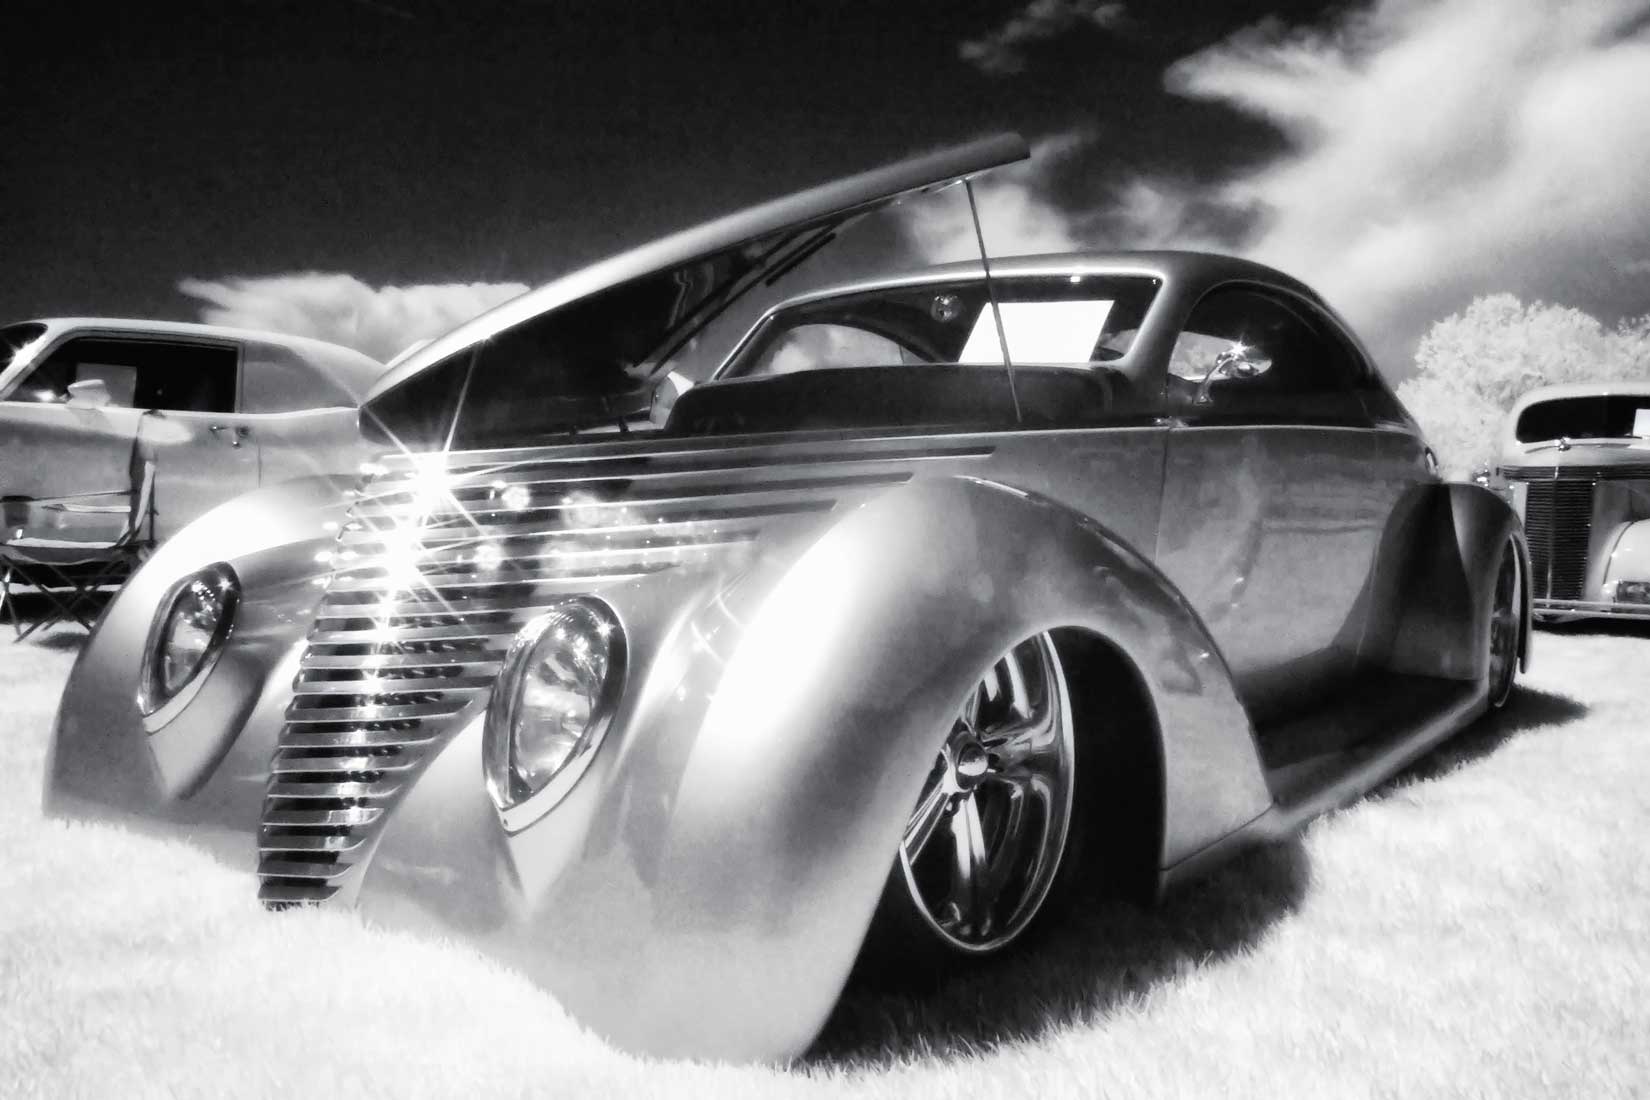
How I Made this Photo: I shot this street rod at a car show with a Fujifilm IS-1 with built-in 28-300mm f/2.8-4.9 lens at 28mm. The Fujifilm IS-1 is designed to photograph subjects in both normal visible light and in the near infra-red range (400nm-900nm.) No star filter was used; those starburst just appeared during exposure, which was 1/500 sec at f/8 and ISO 800. The IS-1 was developed for use in law enforcement, medical/dental and science fields and is a follow-up model to the FinePix S3 Pro UVIR DSLR.
Second, with an infrared filter on the lens or when using an IR-converted camera, you can shoot the photograph using your camera’s Monochrome mode. You can find all the details and my philosophy on this approach in a post entitled Tips for Coping with White Balance for IR Photography. As is the case with any of these options, you can always click the Contact button atop this page and ask a me a question. There is no charge for this and I’m always glad to help.
 Third, if you want to do it in the digital darkroom, here’s another way:
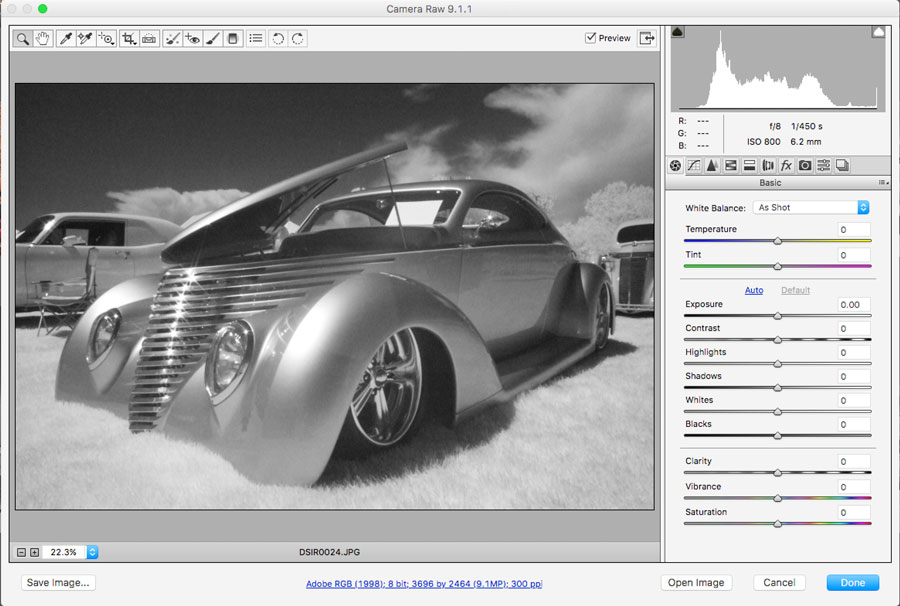
Capturing images in RAW format lets you maximize imaging quality but I usually hedge my bets by shooting in RAW+JPEG, with the camera set in Monochrome mode. This gives me a JPEG preview of how the image looks in black and white and I can use Adobe Bridge to select the RAW image to work with later. Then I open the RAW file, sometimes with Adobe Camera Raw (at left) to tweak the image using its Clarity and Vibrance sliders.
For some tips on how I created a hand colored version of the above photograph, check out my post Hand Color a Porsche Speedster. The same technique works for any kind of car and any marque.
 I’ve found that Life Pixel does a great job with IR conversions and they’ve done most of the conversions for my Canon DSLRs and all of my Panasonic Lumix G-series cameras. This is not a paid or sponsored endorsement, just my experience.
New copies of my book, The Complete Guide to Digital Infrared Photography are currently available from Amazon for $25 while used copies are starting at four bucks as I write this. Creative Digital Monochrome Effects has a chapter on IR photography and new copies are available from Amazon for $11.46 with used copies starting at a little more than six bucks, which is a heckuva deal.