Today’s Post by Joe Farace
“I believe that the essence of photography is black and white. Color is but a deviance.” – Ruth Bernhard
I’ve always though that there is more than just one way to accomplish any kind of effect in photography, especially when shooting infrared. This blog, like my old one, was never a “my way or the highway” blog, so presented for your approval today is how I often (but not always) handle white balance when shooting infrared.*
 One approach to shooting infrared is to make a custom white balance for an IR converted camera by shooting a picture of a healthy (green) lawn to use as a reference image. Every DSLR or mirrorless camera sets custom white balance differently so please refer to your camera’s users guide for how to do it. Hint: Some are easier than others.
That’s one way to get started but purists and some IR gurus may disagree with my approach because I’m breaking some of their cast iron principles. That’s because my goal with my personal photography, including infrared, is to have fun. So here’s a few tips for shooing with an infrared-converted camera and they should work just as well if you’re shooting using IR filters.
Shoot in Monochrome mode. This way, there’s no white balance required, everything is right there on your LCD screen and your image file appears in glorious black & white. If the thought of shooting in JPEG format is anathema to you, just shoot in RAW+JPEG mode with the camera set in monochrome mode serving only to produce a preview of what the RAW file will look like later after processing.
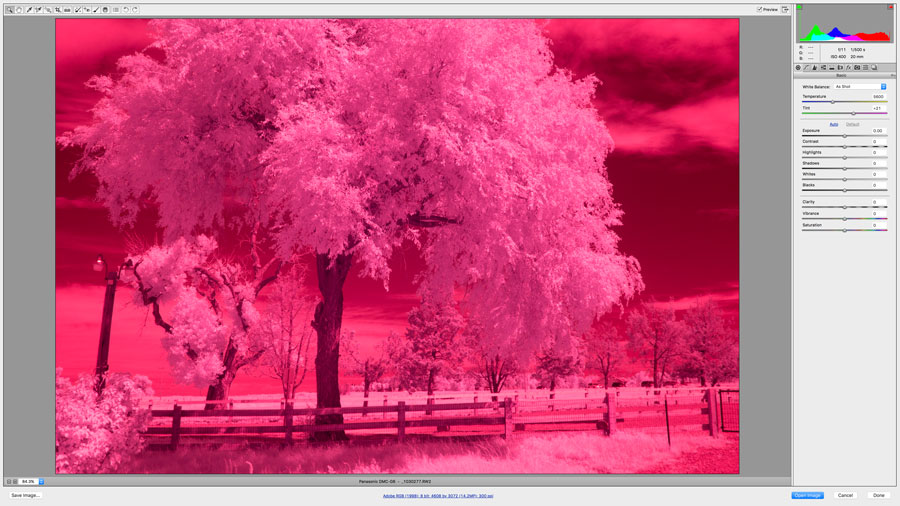
 Typically RAW infrared images exhibit a magenta cast—sometime blue—as seen in the photograph shown at above right. You can open the file in Adobe Camera Raw, ignore the White Balance pop-up menu, navigate to the HSL/Grayscale tab and click the Convert to Grayscale button. You can then tweak using any of the settings under the Basic tab. Alternatively, you can—as I did in today’s featured image—open that magenta-colored RAW file in Silver Efex where the preview thumbnails in the plug-in show the image automatically converted to monochrome.
How I Made this shot: I photographed this tree at Twenty-Mile Historic Park using a Panasonic Lumix G6 that had been converted for infrared capture by Life Pixel using the Enhanced IR filter (equivalent to 665nm filter.) The lens used was the Lumix G Vario 12-32mm f/3.5-5.6 (at 20mm.) The RAW file was captured with an exposure of 1/500 sec at f/11 and ISO 400.
The RAW file was opened in Photoshop then converted to monochrome using Silver Efex then enhanced further with the Glamour Glow filter that’s part of Color Efex Pro with the Glow Warmth slider kicked up a notch to enhance the warm tone.
*To answer this question: Is White Balance Important in Infrared Photography You might want to check out this post, when you have time.
 I’ve found that Life Pixel does a great job with IR conversions and they’ve done most of the conversions for some of my Canon DSLRs and all of my Panasonic Lumix G-series cameras. This is not a paid or sponsored endorsement, just my experience.
My book, The Complete Guide to Digital Infrared Photography is available from Amazon with new copies available for $14.16 and used copies starting for around three bucks as I write this. Creative Digital Monochrome Effects has a chapter on IR photography and is available from Amazon new for $12.19 with used copies starting for less than two bucks.