Today’s Post by Joe Farace
Once upon a time, a Shutterbug reader asked me, “Why do you shoot infrared, when regular photography is already so hard.”
My feeling was then and still is now that IR photography isn’t that difficult and is as hard as you want to make it. That’s why, I was surprised to find that there was a SOOC (Straight Out Of the Camera) movement within the world of infrared photography.
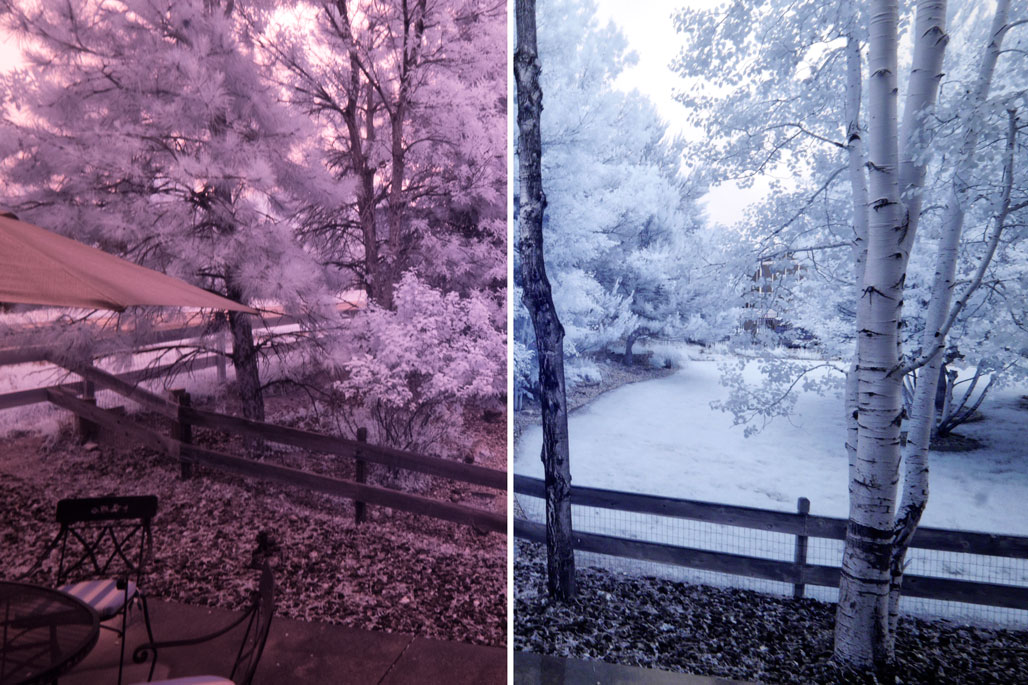
 Straight Out of the Camera, an IR-converted camera will typically produce RAW and JPEG files that look almost identical to what you see in the left-hand half of the above image, exhibiting a heavy magenta cast. If you take the time to create a custom white balance for your converted camera, you will probably (depending on the filter used or camera conversion) end up with JPEG images that look like the right-hand half of the above image, with a blue color cast that intensifies or lessens depending on the image’s actual IR content. It’s this latter aesthetic that the SOOC infrared people seemed to have embraced with open arms, perhaps because they see this version as the purest form of infrared capture. You’ll find some of my recent thoughts on white balance for infrared photography here.
 As someone who has been shooting infrared imagery for many, many years, my preference formerly was to use a monochromatic approach when processing IR image files and many of the infrared photography posts you see on this blog embrace that aesthetic. But I will confess that while shooting IR with my friend Barry Staver and our many passionate discussions about infrared photography has me more recently creating images such as this one, and other more colorful images that I’ve been posting in Instagram, including today. If you’re not following me there, I invite you to join me (@joefarace) which also includes some looks at some non-photographic aspects of my life.
Here’s what I typically do
Many times, but not all of the time, when shooting infrared images I forget about custom white balance and set the camera’s Photo Style menu to Monochrome and select the RAW+JPEG capture option. This method produces a black and white preview on the camera’s LCD screen and/or EVF, while retaining the color RAW file for monochrome conversion later using Silver Efex or Exposure Software’s Exposure.
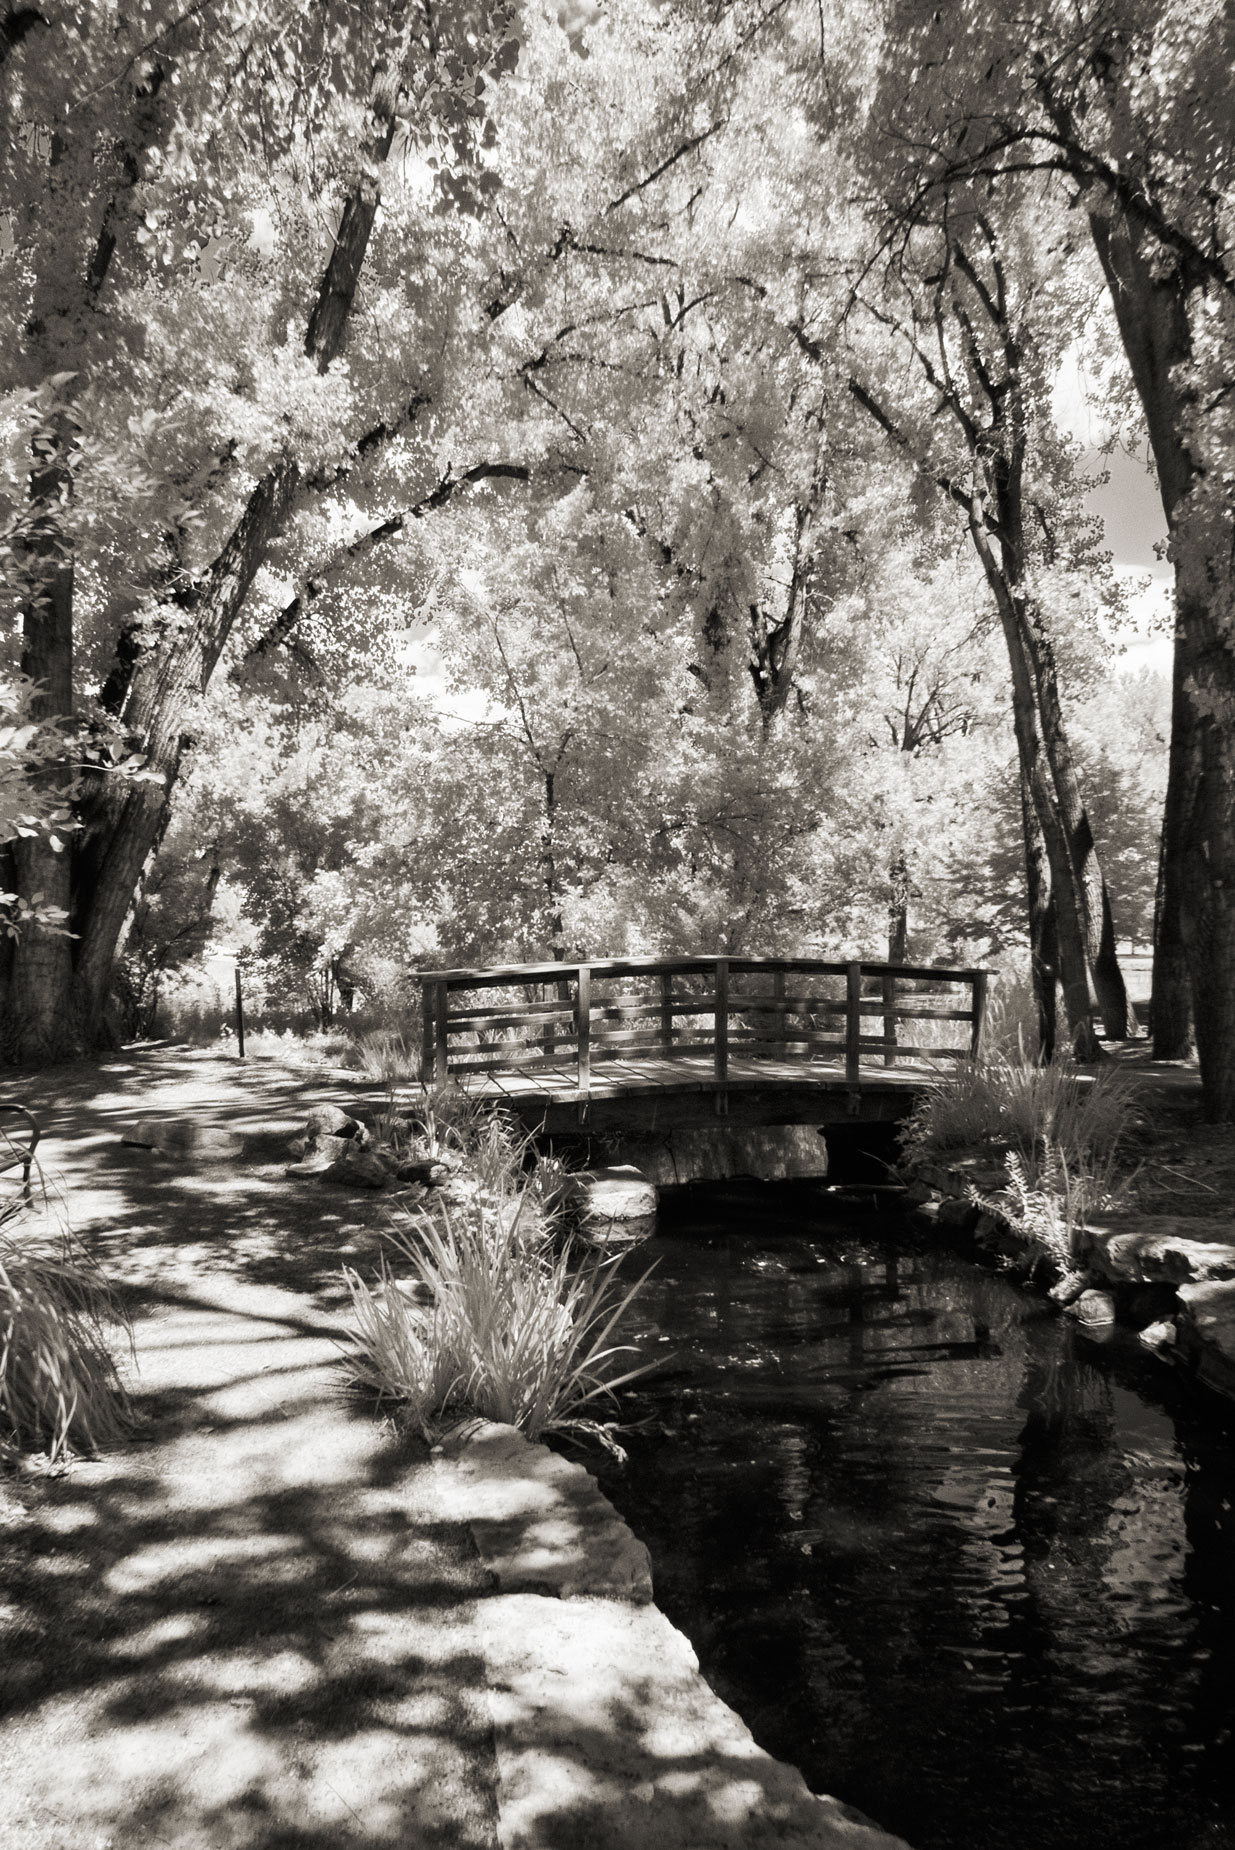
How I Made this Photograph:I made this image while on a PhotoWalk at Littleton Colorado’s Hudson Gardens with my pal and terrific photographer Barry Staver. The Camera was a used Panasonic Lumix GX1 that I had purchased from Robert’s Camera and had converted for infrared capture with Life Pixel’s Hyper Color filter—no stated nm rating, sorry. The lens used was the Lumix G Vario 12-32mm f/3.5-5.6 (at 13mm) that is a kit lens with some Lumix cameras. The exposure was 1/250 sec at f/16 and ISO 400 and was captured as a RAW+JPEG. The RAW file was converted to Monochrome using Silver Efex and was sepia toned is PhotoKit 2 before some slight tweaking using Photoshop’s Curves.
