Today’s Post by Joe Farace
“To me, infrared photography is not a special effect like some Instagram filter, it’s a different way of looking at photography and light and the world itself.”— Dean McIntyre
There are lots of ways that you can create infrared photographs: You can capture IR images with almost any DSLR or mirrorless camera using an on-lens filter such as Hoya’s R72 Infrared or you can choose to have one of your existing cameras converted for infrared-only capture by companies such as LifePixel. For my mirrorless infrared photography, that’s the option I chose and had my Panasonic Lumix G5 converted using the company’s Standard IR conversion.
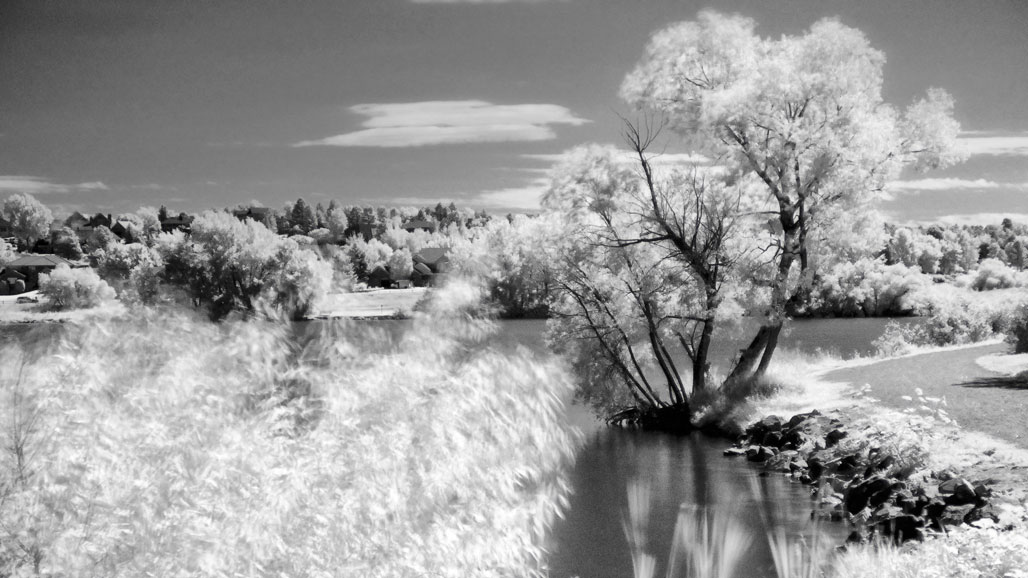
LifePixel had the camera in-house for seven working days and shipped it back to me via UPS. I was excited when it arrived and immediately put a Lumix G Vario 14-42mm 3.5-5.6 kit lens on the camera and walked to nearby Bingham Lake to recreate the an IR image that I had originally made using a filter.
 How I made these shots: For the image at left, a Panasonic Lumix G5 made with the 14-42mm kit lens with Hoya IR filter attached was mounted on a tripod and produced a filtered exposure of 15 sec at f/5.2 and ISO 1600, which accounts for the blurry foliage in the foreground.
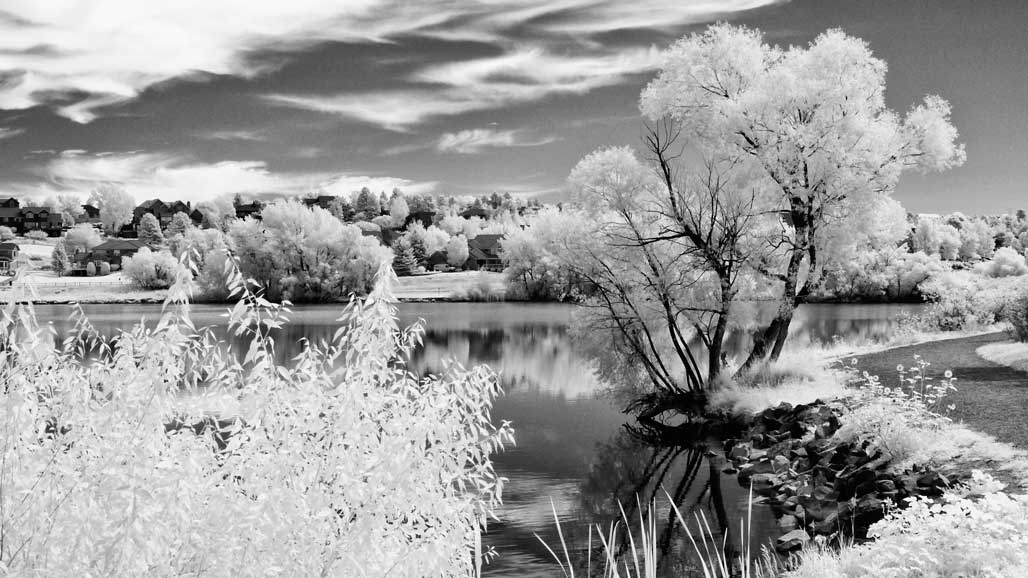
The below image was made using the same camera and lens combination, but after the Lumix G5 had been converted by LifePixel for infrared-only capture using the Standard IR (720nm) filter. To make the best possible comparison, I tried to use as close a cropping as I could get to the original and that produced a handheld exposure on 1/320 sec at f/9 and ISO 400.
 To be fair, there are upsides and downside to choosing either method. Using filters is less expensive and the resulting long exposures sometimes create really interesting-looking cloud shapes. Converting your camera for IR capture is more expensive and it can then only be used for infrared photography. But you will get handheld shutter speeds giving you lots of freedom of movement and composition.
The lower ISO settings that are possible with a converted camera tend to produce a crisp, less noisy image. I typically shoot my infrared images in RAW+JPEG, with the JPEG file set in Monochrome mode so I can preview what the final image might look like on the camera’s LCD screen. Then I process the RAW file, typically with Silver Efex as I did here, into the finished monochrome photograph to maximize image quality. That’s my workflow: you may choose another approach.
