Today’s Post by Joe Farace
“There are no rules for good photographs, there are only good photographs.” – Ansel Adams
Whenever I get a new lens to test one of the first questions I typical get about it from readers and one I try to answer in any review is “How close will it focus.” All of which brings us to the subject of macro photography.
Up Close and Personal
Macro photography is all about photographing objects that are close, really really close to the camera’s lens. The classic definition of macro photography is that the image on the film plane or sensor is the same size as the object being photographed. There are several methods that you can use to accomplish this:
The easiest, simplest and cheapest way to try macro photography is by using inexpensive supplementary lenses, often referred to as “close up filters.” This technique is something I wrote about in my post Macro Photography with Inexpensive Filters and, when you have time, read it for more details.
The other, more expensive approach, is through the use of a dedicated macro lens. Most macro lenses will focus to at least 1:2 or half the size of the object being photographed but many of them will go full 1:1. An important difference, when compared to the other lenses you may own, is that they are optimized to be their sharpest at macro focusing distances and, it is sometimes said, they may not be as sharp at other distances, although my experiences with the macro lenses I’ve used is to the contrary.
Caveat: In recent years, the term “macro” has come to mean a lens that will focus on a subject close enough so the image is life-size or larger when viewed on a 4×6-inch print. When considering purchasing a macro lens. it’s a good idea to read the fine print to see how close and at what ratio a given lens will focus,

How I made this photograph: I stopped by a local supermarket and bought the cheapest bundle of flowers they had. Initially I mounted an Olympus E-M5 Mark I onto an inexpensive Macro Focusing Rail, which in turn was attached to a old but sturdy Manfrotto tripod. The Focusing Rail proved to be useless–sometime you do get what you paid for– and none of the pictures I made with it were sharp. So I mounted the camera directly onto the tripod and was able to produce the above image. The lens used was an Olympus M.Zuiko 60mm f/2.8 Macro with an exposure of 1/6 sec at f/16 and ISO 1600.
For Your Macro Lens and Close Up Filters
Use a LensPen: They have two accessible working ends and are compact enough you can clip one in your pocket or toss it into your camera bag or backpack. Which LensPen should you use? Why not start with the DSLR Pro Kit Black Series ($28.95) that contains everything a photographer might need to keep their camera lenses and filters clean.
The DSLR Pro Kit includes:
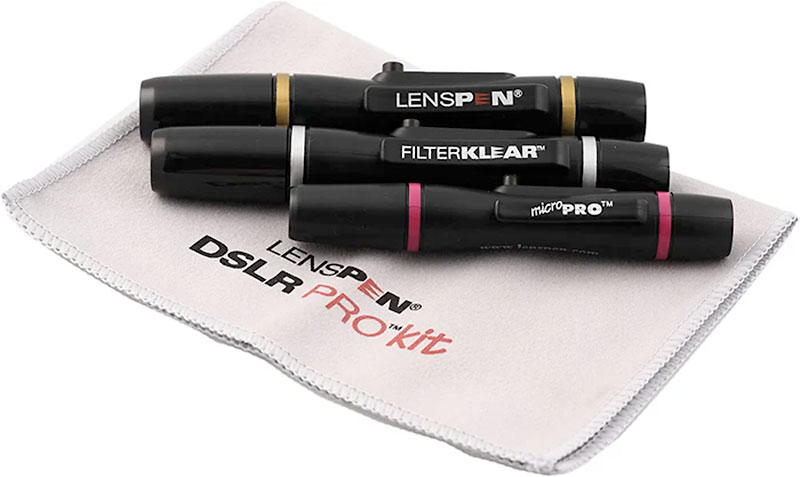 An Original LensPen for use with DSLR and mirrorless camera lenses. This is full size (4.3-inch) and has a 12mm concave cleaning tip designed to match the slightly convex shape of a camera lens
- A FilterKlear for cleaning lens filters, including close up, UV, Haze as well as color filters for film photographers and infrared photography shooters out there. It’s also full-size (4.3-inches) and has a completely flat 12mm cleaning tip to match any size of camera filter.
- The MicroPro is designed for cleaning viewfinders, either optical for DSLRs and film cameras or EVF’s for mirrorless cameras. It’s LensPen’s smallest (3.7-inches) and the 4mm cleaning tip is crafted to clean any kind of viewfinder, EVF,or other small optical surfaces
The DSLR Pro Kit comes with a handy microfiber carrying pouch that doubles as a cloth that can be used for other cleaning applications.
LensPen is a long-time sponsor of my sites and blogs but I was using their products long before I even had a blog. My wife gave me my first LensPen in 1994 as a gift, just after I acquired a Nikon N90s SLR! I would like to thank LensPen for their continued support.