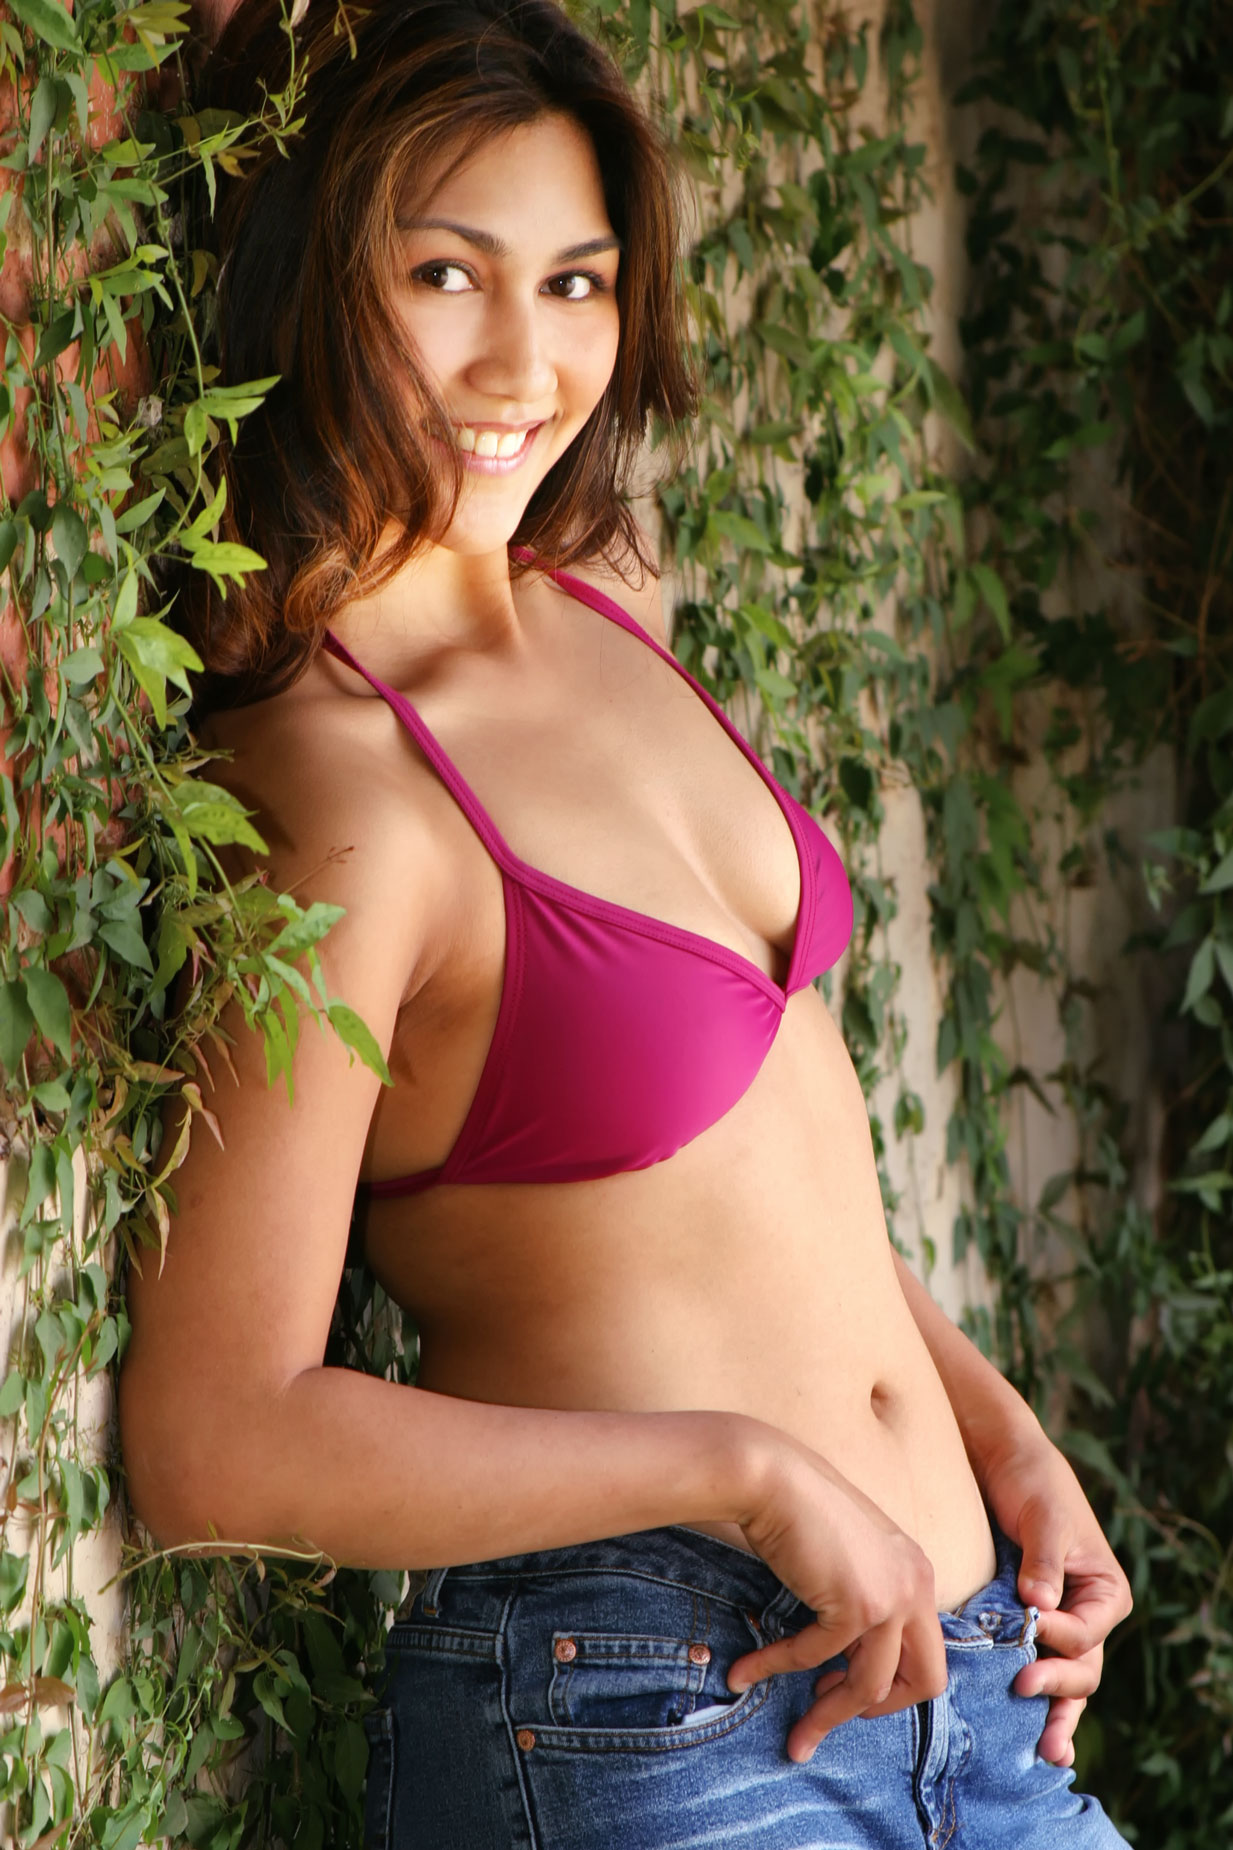
My Sunday series on outdoor portraiture continues today with a portrait of Jade, a lovely model I only got to photograph once during a group model shoot in Phoenix. Arizona.
Today’s Post by Joe Farace
“There’s nothing more interesting than the landscape of the human face” – Irvin Kershner.
When it comes to determining the proper exposure for portraiture, whether outdoors or in-studio, there are all kinds of so-called rules telling you what the ideal lighting ratio should be. You’ll often hear the ratio of 3:1 (main light to fill light) tossed around as standard but as far as I’m concerned, it’s not something that’s cast in concrete. To me it feels like the whole riff on composition, such as “rule of thirds” or “leading lines.” Sure, these are good guidelines but that’s all they are and can be a big help especially when you begin your journey in photography. As you gain more experience, and this is just my opinion, these are rules that you can break. Nowhere is proper exposure more important than in portrait lighting where keeping skin tone in balance with the rest of the image can be critical.
 How I made this portrait: I photographed Jade outdoors during a group model shoot in Phoenix, Arizona using a 6.3-megapixel Canon EOS 10D with an EF 28-105mm f/3.5-4.5 II USM lens set at 105mm. That lens used to be affordable and is optically quite good. I’m sorry I sold mine back when I was wrapped up in a “newer is better” attitude that I’ve since gotten over. The exposure was 1/60 sec at f/7.1 and ISO 200 with a minus two-thirds stop exposure compensation. A Canon 550EX speedlite was used as fill, with a Sto-Fen Omni-Bounce diffuser attached to soften the light.
Here’s a few tips for your next portrait session
When making portraits outdoor. I like to measure the light on both sides of a person’s face in order to determine the image’s lighting ratio. For me, the correct ratio varies depends on the shape of the subject’s face and the overall look I want for the final image.
Be sure to talk to your subject. Photographing people combines elements of psychology as well as camera technique and how you interact with your subject will have more to do with the success of your session than the camera or lens you decide to use. I’ll never forget the advice one of my mentors gave me years ago when I was getting started in photography. When I asked him what was the worst thing I could do when making a portrait, I thought he would tell me how to avoid technical problems but his answer surprised me. “If you don’t talk to the people, you’re never going make a good portrait.”
Using a hand-held meter not only lets you easily measure the light that’s falling on a subject but also provides an opportunity for you to interact with the subject. When talking a incident meter reading you are physically close to the subject and can talk to them reassuring them that they look fabulous.
Watch the background. It’s easy to become so enthralled by the person you’re photographing that you forget about the background where you’ve placed them. One of Farace’s Laws is that if you watch the background, the foreground will take care of itself. Nowhere is this more true that in shooting portraits outdoors. Busy, ugly backgrounds can be thrown out of focus by using longer focal length lenses and wide apertures but it’s not uncommon to have to physically clean up a site before you make a portrait. While you can always digitally remove beer cans and fast food wrappers, taking the time to physically clean up any trash before you make a portrait leaves it clean for everybody else too.
