In Joe and Barry’s latest Grain. Pixels and Cookies podcast, the boys talk about infrared photograph from nuts to bolts. If you have a chance please check it out. It may answer any questions you might have after reading today’s post on the subject.
Today’s Post by Joe Farace
Eschew the ordinary, disdain the commonplace—Chuck Jones. Yes that Chuck Jones who also said “Bugs is who we want to be. Daffy is who we are.”
Lest you think digital infrared capture is an esoteric photographic pursuit, a recent Google search turned up 123,000,000 hits for the words “digital infrared.” By comparison a search for “Gum Bichromate” produced only 263,000 hits; now that technique is surely a bit more esoteric.
Give Infrared Photography a Try
 The simplest reason for shooting digital infrared photographs is that this technique has the power to transform mundane visual experiences into something that just might just be unforgettable.
Everyday scenes you might walk right by and never think of photographing, take on a dreamy look—my wife’s words— when seen in infrared. Nevertheless, digital IR photography is not for everyone. I have to assume monochrome images that have dark skies, snow-white foliage and increased contrast appeal to your aesthetic sensibilities. Similarly, if you enjoy the crazy color effects IR photography can produce, you might apprentice it and it’s fun.
Digital IR photography has many advantages over shooting infrared film. Back in the days of IR film, you needed to use special film and load and unload the film in total darkness. When combined with shooting through almost opaque filters and using an Exposure Index that could best be described as “what the heck,” it was a challenge.
Many monochrome images that are captured with IR film can be grainy while digital infrared image may or may not be noisy, depending on the ISO setting you’ve selected. If you find digital noise or film grain, for that matter, objectionable, you can get some tips on how to deal with it in my post “Tips for Dealing with Digital Noise in Your Photographs.”

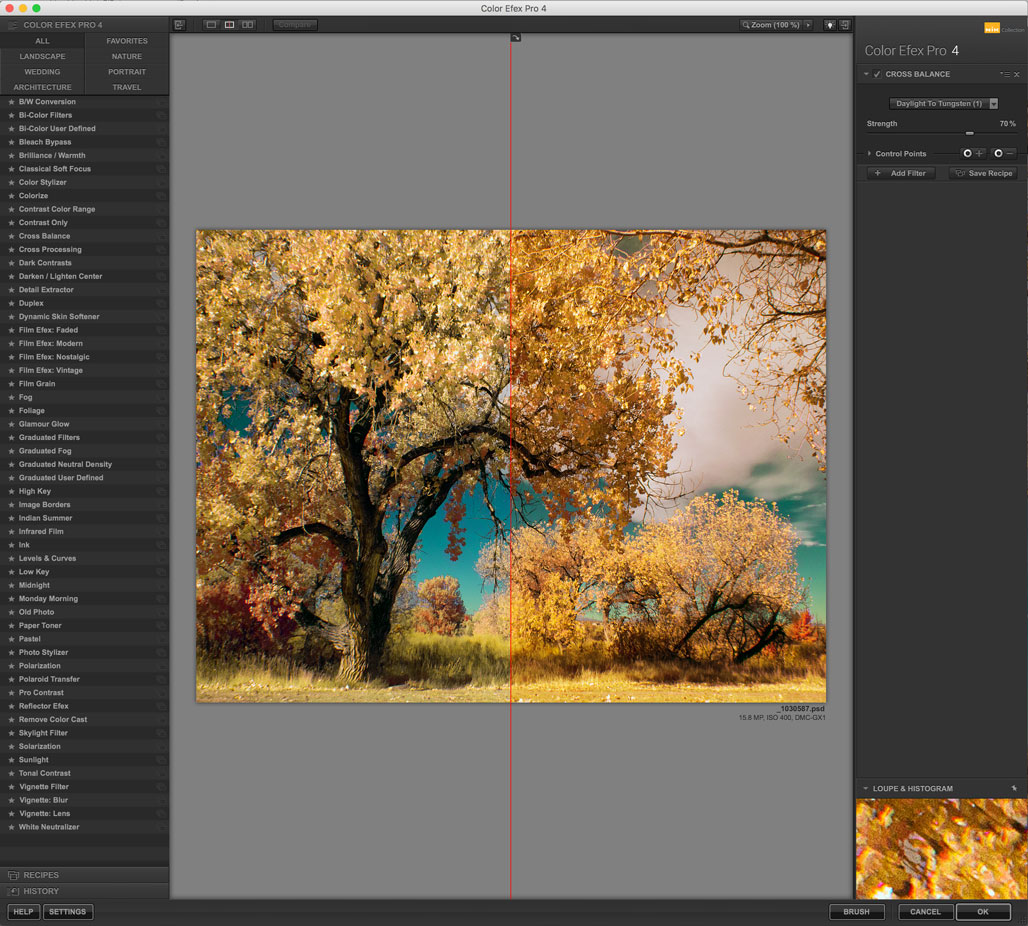
How I Made this Photograph: I made this image when I made what I thought was “Last Chance Infrared” using a Panasonic Lumix GX1 that had been converted for infrared capture by Life Pixel using their Hyper Color filter. The lens used was an Olympus M.Zuiko 17mm f/2.8 with an Av exposure of 1/800 at f/16 and ISO 400. The RAW file was processed using the Hyper Color to Super Color Photoshop action that was at one time included with camera conversions from the company. The image file was further enhanced using the Cross Balance preset that’s part of Color Efex.
Digital infrared capture lets you immediately check the exposure after capture and make any necessary changes to your camera settings using either the Manual controls or the exposure compensation control. One of the biggest advantages of using mirrorless cameras is that you can make any adjustments just by looking at the EVF before snapping the shutter.
Exposure for IR film, on the other hand, is mostly experience and guesswork. To work with IR film you needed special filters. You can check out my YouTube video on the subject here. You’ll either have to process the film yourself or find an ever-dwindling pool of specialty labs to do it for you. With digital IR capture you can make prints at Wal-Mart directly from your memory card.
 I’ve found that Life Pixel does a great job with IR conversions and they’ve done some of the conversions for my Canon DSLRs and all of my Panasonic Lumix G-series cameras. This is not a paid or sponsored endorsement, just my experience.
Used copies of my book, The Complete Guide to Digital Infrared Photography are available from Amazon starting around nine bucks as I write this. My book Creative Digital Monochrome Effects has a chapter on IR photography and is available new from Amazon for $11.46 with used copies starting around six bucks as I write this.