Today’s Post by Joe Farace
A little while ago I received an e-mail asking about whether using an inexpensive screw-on Fisheye lens was a good idea. This is my response…
 One question I’m often asked about some of my SFX images: Is the final image a photograph or a digital illustration? To tell you the truth I think that all of the images I create, whether it’s using film or digital capture, are photography.
This fast and furious effect shown today isn’t anything new and the concept wasn’t originally digital. Photographers have been using zoom lenses along with slow shutter speeds and zooming during exposure since the first zoom lens was introduced. The biggest difference in doing it with digital techniques is that it’s more controllable and repeatable.
How I made this shot: The original image of this hot rod was captured using a Canon EOS 50D camera with an EF 22-55mm f/4–5.6 USM lens.
To make the image I attached an inexpensive Fisheye lens adapter onto the lens. To hide the soft edges produced by this inexpensive optic, while enhancing the overall effect, I used Photoshop to tweak the image further. Here’s what I did:
- Step 1: I started by using Photoshop’s Levels and Curves functions to improve depth and contrast and brighten the photograph.
- Step 2: When the image looked as good as I could make it, I added a duplicate layer.
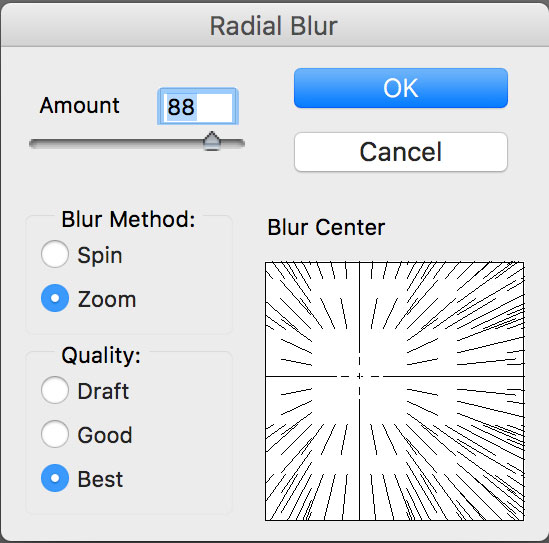
- Step 3: Then I chose the Radial Blur tool from the Filter menu, I checked the Zoom option and placed the originating point where I wanted the effect to start. In this case, it was the middle of the windshield but you can put that point anywhere that you like. I used the Amount slider to set the length of the zoom blur but you should experiment with different settings until you find one you like.
 Step 4: Using Photoshop’s Eraser tool, I erased areas on the duplicate (zoom) later and allowed parts of the bottom original image show through.
Tips: While erasing, lower the opacity in the Layer’s palette so you can easily see through to the layer below. Don’t set the Eraser at 100% opacity. Use something less and be sure to use a soft-edged brush, so you can control how much is zoom and how much is seen from the original picture.
You can leave the image with the layers intact and save the image as a TIFF or PSD file or use the Flatten Image command to combine layers and save in the file format of your choice. When finished, you’ll have added motion to a still image and created an image that will be as much fun to look at as it was to create.
There are several posts about hot rods on my car photography blog, including this and that. If you enjoy looking at or photographing hot rods, please check them out when you have time.
If you enjoyed today’s blog post and would like to treat me to a cup of Earl Grey tea ($350), please click here. And if you do, thanks so much.