It’s “Tricky Tuesday,” a way for me to share some of the tricks, tips and techniques I’ve used over the years when shooting portraits in the studio. This Tuesday’s post features the indomitable Pam Simpson. It’s also National Engineers Week, a time to celebrate these professionals and everything they bring to society. As someone, who started their working life as an engineer—a story for another day—this used to be a big deal to me.
Today’s Post by Joe Farace
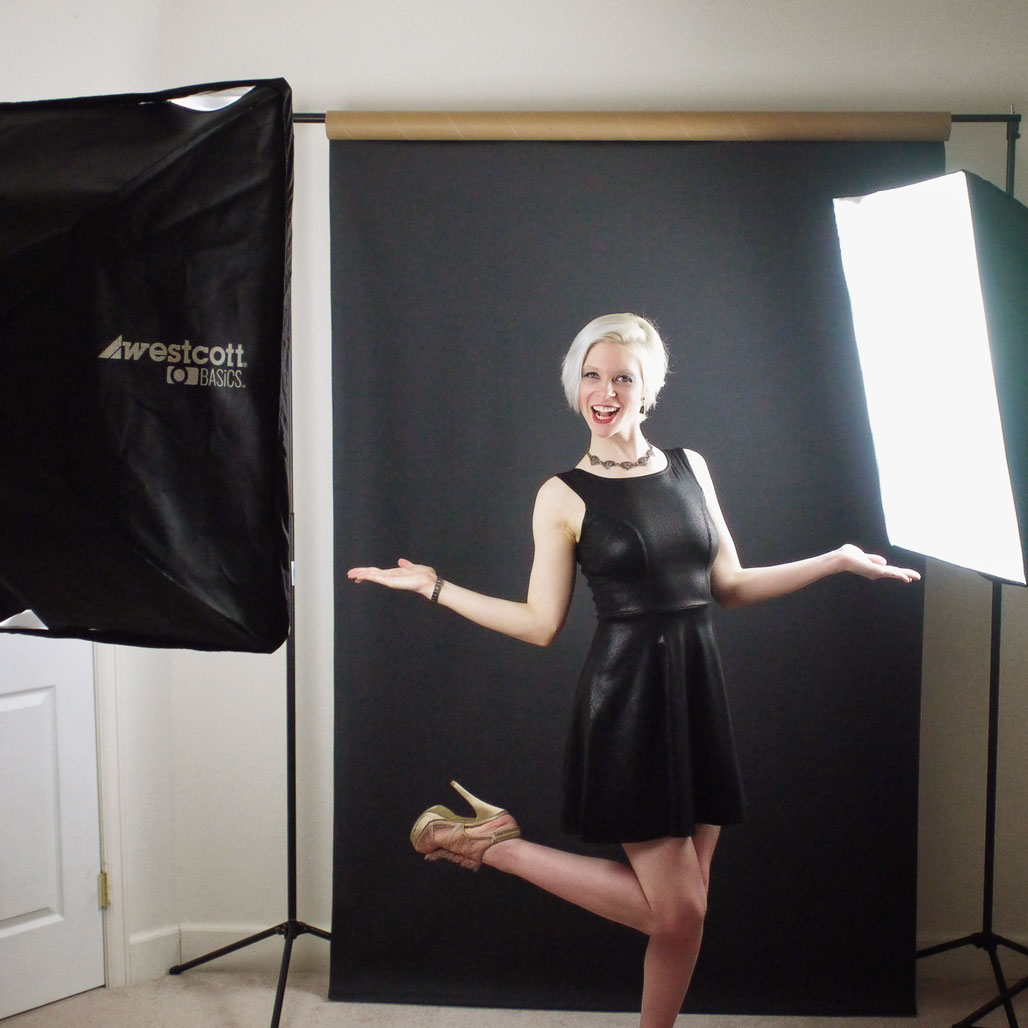 Some photographers think that studio lighting equipment is expensive and complicated to operate but neither assumption has to be true. Continuous light sources can be less expensive than studio electronic flash. (Look for a link to an inexpensive LED system, at the bottom of this post.) They also can make the portrait lighting process seamless and instead of the subject being distracted (and blinking) from popping electronic flashes, continuous light sources let them relax, keep their eyes open and smile like Pam is doing at right.
It’s All About Continuous Light
For many years photographers have used photoflood, tungsten, quartz and other kinds of continuous light sources that typically fell under the general category of “hot lights.” These light sources had many advantages over flash: Some, like photofloods, were really inexpensive and all of different continuous lighting options let you see the light that’s falling on the subject allowing you to use your camera’s in-camera meter or even Program mode, as I did with today’s portrait. The big problem with traditional “hot lights” is well, they’re hot and not all that comfortable to work under for both subject and photographer.
 How about fluorescent? I know what you’re thinking, don’t fluorescent lights produce horrible green colored light? While that can be the case but doesn’t have to be. The RGB output spikes of daylight balanced fluorescent lighting closely matches the receptive RGB spikes of most imaging sensors. By comparison, tungsten lights produce 93 percent heat but just seven percent red light. Fluorescent lights, on the other hand, are cooler and brighter but…
How I made this portrait: For this photograph of Pamela Simpson in full-blown Jean Harlow mode, I placed one of Westcott’s D5/softboxes combos at camera left, another D5/softbox at camera right slightly behind her. (see the setup shot at above right.) The lighting featured the Westcott D5 fluorescent lighting head with all of its bulbs illuminated. The portrait was made using a Panasonic Lumix GH4 and Lumix G Vario 14-45mm f/3.5-5.6 lens (at 35mm) along with a Program mode exposure of 1/30 sec at f/5.6 and ISO 640. It was converted to monochrome using Silver Efex and layered with the Vignette Blur filter from Color Efex to add an Old Hollywood look.
About the lighting used for this shot: Westcott’s now-discontinued Two-Light D5 Softbox Kit included two D5 fluorescent heads and a pair of 24×32-inch softboxes. Each D5 head featured five ceramic light sockets, each supporting a 50-Watt FLD lamps. The D5 head has five power switches arranged across it’s back, one for each bulb so you can control the amount of output. Although CFL bulbs may be safely recycled, they have fallen out of ecological fashion and lighting systems, like the D5, are no longer available. That lighting system was replaced by the company’s uLite LED 2-Light Collapsible Softbox Kit ($79.99) that I do not currently own.
 If you enjoyed today’s blog post and would like to treat me to a cup of Earl Grey tea ($2.50), please click here. And if you do, thanks so much.
My book Joe Farace’s Glamour Photography is full of tips, tools and techniques for glamour and boudoir photography and includes information on all of the cameras used as well as the complete exposure data for each image. New copies are available for $41.01 with used books starting around thirteen bucks.as I write this. The Kindle version is $19.99 for those preferring a digital format.