I’ve given #filmfriday the day off today as I await the time (and weather) for shooting some of the new film emulsions I acquired over the Winter. In it’s place today, is a look at an interesting lens for the Micro Four-thirds system that I shot with an infrared-converted camera.
Today’s Post by Joe Farace
Leica, schmeica. The camera doesn’t make a bit of difference. All of them can record what you are seeing. But you have to see.—Ernst Haas
 Some thoughts: Did’ja ever notice that older established photographers who use expensive camera, like Mr. Haas shooting with Leicas, always say something like that. While I agree the camera used is less important than a photographer’s vision, statements like that make me both chuckle and remember a time when I was a budget-challenged young photographer shooting with secondhand and well-used Minolta 35mm and Mamiya medium format cameras and could only dream about owning a Leica.
The Wide Angle View
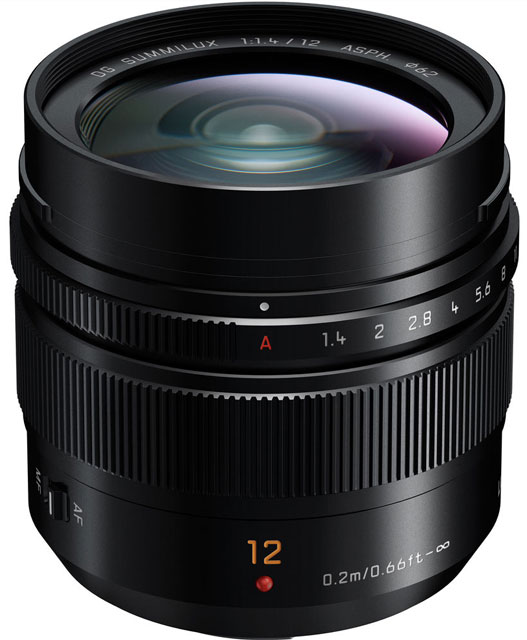
I think—and I may be wrong about this—that infrared images that are captured with wide-angle lenses have more visual power than those shot using “normal” or longer focal length lenses. That’s why the first thing I did after receiving a Panasonic Leica DG Summilux 12mm f/1.4 ASPH lens for testing was to head down to McCabe Meadows to shoot some infrared images with a Panasonic Lumix G6 that was converted for infrared capture by LifePixel using their Enhanced IR (665nm) filter.
 How I made this shot: Not surprisingly, this is a beautifully crafted lens and I guess it should be for almost $1200. With the 12mm Summilux mounted on the relatively lightweight Lumix G6, the balance was surprisingly good. Exposure was 1/125 sec at f/16 and ISO 400 with a plus one-third stop exposure compensation. I used PhotoKit’s Burn function to tone down a small hot spot near the center of the image. I also used PhotoKit’s toning function to add a Platinum tone to the original RAW file after it was converted to monochrome with Silver Efex.
Flare: An Issue?
If you’ve shot infrared photographs away from the prime-time IR hours of Noon to 1:00 PM, you know that flare can be an issue, especially with wide-angle lenses. Alas the nicely made lens hood that Panasonic includes with the lens is not much help with that. When I was making these images, even close to noon, flare kept creeping into some of the shots and I had to use my hand to shade the lens’s front element. .
Another thing this PhotoWalk taught me was that as soon as I think I’ve got a handle on proper infrared exposure techniques, I discover that I don’t. This is something I also discovered with my newly acquired Lumix G Fisheye 8mm f/3.5 lens. (Check out this post about that lens.) Tip: You shouldn’t always count on the camera’s LCD to give you any help with exposure and sometimes flare too. What looks good on the EVF or LCD may not look all that great when you open the image file with your computer. I’m going to start shooting Infrared with a two-stop bracket sequence all this Summer —whenever it finally starts—until all the leaves drop off.
Postscript”: I later used the lens with an Olympus E-M10 Mark I to photograph cars and on that lightweight camera the 11.82-oz 12mm Panasonic Leica DG Summilux f/1.4 ASPH lens didn’t feel as balanced, even though I was using Oly’s official grip, which adds a tiny bit of heft to the camera. The lens felt more balanced on the Lumix, yet looked awesome on the E-M10.
 Life Pixel does a great job with IR conversions and they have done most the conversions for my Canon DSLRs as well all of my Panasonic Lumix G-series cameras. This is not a paid or sponsored endorsement, just my experience.
Used copies of my book, The Complete Guide to Digital Infrared Photography are available from Amazon for $13.85 as I write this. My book Creative Digital Monochrome Effects has a chapter on IR photography and is available new from Amazon for $11.46 with used copies starting around eight bucks