Today’s Post by Joe Farace
In my view you cannot claim to have seen something until you have photographed it. — Emile Zola
One of the things I like to do to get myself out of a rut is to shoot some photographs—landscapes to portraits and glamour— in monochrome. It doesn’t have to be all of the images I’ll make during a session; maybe just a few, just to see what happens.
The Challenge of Black and White
These days, when shooting in monochrome mode I’ll often use a “belt and suspender” approach that gives me options when later processing. When shooting in monochrome mode, most DSLRs and mirrorless cameras have a RAW+JPEG option that lets you capture monochrome (JPEG) and color (RAW) files at the same time, while displaying a black and white image in the EVF and LCD.
This approach to black and white photography is especially useful when doing a test shoot with a new model where, after the shoots over, I’ll give her the monochrome JPEG files and use the RAW files to create the final version. You can see some examples of this by clicking on any of the RELATED posts at the bottom of this post.
Even when photographing nature, I find the RAW+JPEG monochrome method to be a good option because i get a preview on the LCD screen of what the image will look like after I covert the RAW file into black and white. Capturing images originally in color and converting them to monochrome is a good idea—give it a try—and is the main reason I like the RAW+JPEG option, as was the case in today’s featured image.

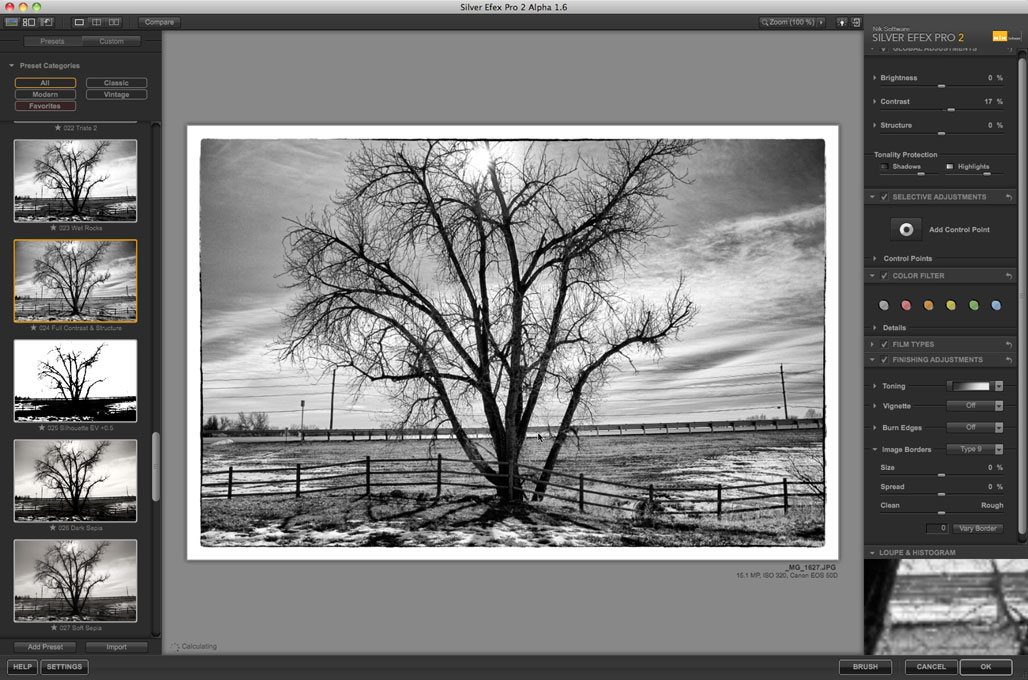
How I Made this shot: This is my favorite tree for testing lens flare—not my all time favorite tree in McCabe Meadows—and it’s located near the entrance to the Morgan Smith nature area near Brighton, Colorado. Capturing this tree in color can produce a dramatic image but converting it into monochrome, I think, kicks the drama up a notch.
 The camera used was the Canon EOS 50D with the EF-S18-135mm f/3.5-5.6 IS USM lens (at 18mm.) On a Canon APS DSLR, with its 1.6x magnification ratio, the 18-135mm lens produces a 28-216mm equivalent focal length range covering from wide-angle to telephoto angles-of-view. Its optical design utilizes one UD (Ultra-low dispersion) element and one aspherical element to minimize chromatic and spherical aberrations throughout the zoom range. Canon’s Super Spectra coating was applied to the elements to minimize ghosting and flare, which as you can see was well controlled.
The Av exposure for the above image was 1/800 at f/11 and ISO 320. The RAW file was converted to monochrome using Silver Efex. I started with the High Structure (harsh) preset and tweaked it just slightly with Silver Efex’s sliders. There is also a (smooth) option, as there is with many of the other presets, but the Harsh version seemed to fit the subject’s spindly branches better. That‘s the joy of using the software; There are lots of options available to fit the subject matter.The final touch was adding just a touch of Glamour Glow from Color Efex to knock of any rough edges from the “Harsh” conversion and the image was finished with some Platinum toning from PhotoKit.

My book Creative Digital Monochrome Effects is available from Amazon with new copies at $11.46 with used copies starting at a little more than six bucks, as I write this. There’s no Kindle version available, sorry.