My Sunday Series of posts about available light portraiture continues today. In a previous post, I featured Farrin who I photographed at a group model shoot in Northern Colorado. During that same event, I photographed her twin sister, Brenda. In that post, I said, “maybe my portraits of Brenda will show up in a future post in this series.” Well today’s that day…
Today’s Post by Joe Farace
“Identical twins. I’m glad they’re identical ’cause you save money on photographs” — Ray Romano,
 All modern cameras have some kind of built-in light meter and some even have spot meters but I still occasionally still use a hand-held meter, especially when photographing people outdoors.
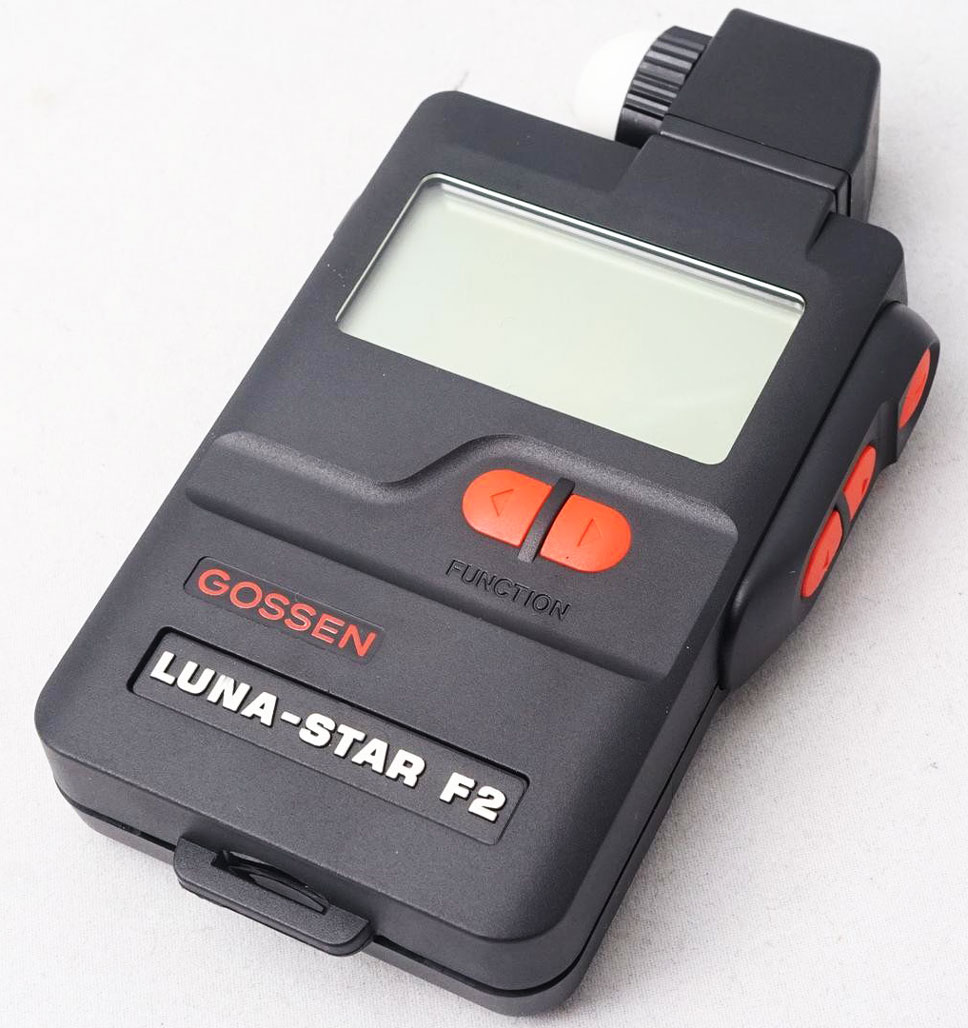
The Handheld Meter
The hand-held meter I use is a Gossen Luna Star F2. Yes, it’s old but that’s the thing about light meters; Well made meters, like Gossens, last for years! This meter is small, lightweight and takes reflected, flash or incident readings, which is how I like to use it when making outdoor portraits.
- Reflected-light meters measure the light that’s reflected by the scene or the subject being photographed. (All in-camera meters are reflected-light meters.) A Kodak grey card is 18% grey and Ansel Adam’s Zone V in his Zone System is represented as 18% grey. But…The ANSI (American National Standards Institute ) standard is for a luminance value that’s roughly equivalent to the reflectance of 12% gray, something often misunderstood and is why some hand held meters, notably Sekonic’s, use that measurement as a reference.
- Incident light meters measure the amount of light that’s falling on a subject and to accomplish that a handheld meter typically has a diffuser with a flat or hemispherical field-of-view sitting atop its light sensor. Because the incident-light reading is independent of a subject’s reflectance, it is less likely to lead to incorrect exposures for subjects with unusual average reflectance. Most reflected light meters have a built-in accessory that will also let you make an incident reading.
 How I made this portrait: This retro portrait of the incredibly cute Brenda was made with a Canon EOS 5D Mark I and one of my favorite lenses, the wonderful but discontinued EF 28-135mm f/3.5-5.6 IS USM. New copies of the lens can evidently still be picked up on Amazon; here’s a link. My available light manual mode exposure was 1/125 sec at f/6.3 and ISO 640. The JPEG image file wasn’t retouched. I just added some slight burning and dodging via PhotoKit, then slightly tweaked the photograph in Vivenza.
When making an outdoor portrait, I like to use Incident metering because it reads the intensity of light falling on the subject rather than what’s reflected by it. My Gossen Luna Star F2 meter also measures flash, making corded or non-corded flash readings. While working with portrait subjects, like Brenda, I like to measure the light on both sides of a their face to determine the lighting ratio.
There are all kinds of rules of thumb telling you what an ideal lighting ratio should be. A ratio of 3:1 is often cited as something to shoot for but Renaissance painters used a technique called chiaroscuro that featured lighting ratios that would make most studio photographer’s hair stand on end but created art that has transcended the centuries. I believe the “right” ratio will vary depending on the shape of the subject’s face and the look you want to produce in the final image.

My book Joe Farace’s Glamour Photography is full of tips, tools and techniques for glamour and boudoir photography and includes information on all of the cameras used as well as the complete exposure data for each image. New copies are $34.41 with used copies starting around thirty bucks,as I write this. The Kindle version is $19.99 for those preferring a digital format.