Over the past several years I’ve occasionally written about Kodak’s (defunct) Photo CD process and its contemporary usage. The process was announced in 1990 but Kodak not only abandoned the format by 2004, they never released its technical specifications. That’s why Photo CD remains an orphan format and is a cautionary tale of the dangers of adopting a proprietary image format. You can use the search function to find other posts about Photo CD on this site but you might want to start with this post I recently wrote,
Today’s Post by Joe Farace
Photography is a way of feeling, of touching, of loving. What you have caught on film is captured forever… it remembers little things, long after you have forgotten everything.—Aaron Siskind
 If you shot film in the past chances are good you used Kodak’s Photo CD process to scan your slides or negatives. The system was created for digitizing and saving photos onto a CD and was designed to hold 100 high-quality images using special proprietary—ultimate spelling its demise—encoding. Due to the low cost and high quality of the scans, Photo CD was popular among professional photographers but the system failed mostly due to its proprietary nature. For a time a Photoshop compatible plug-in for Photo CD was available from Adobe but no more. For a long time, Apple’s iPhoto would read these image files but no more. Yet when you insert a Photo CD disc in a macOS computer, iPhoto automatically loads.
What Are Your Options
To access Photo CD images IrFanview (Windows) or GraphicConverter (macOS and Windows) are usually recommended. If you know of anther solution please contact me and let me know. With my older 27-inch 5K iMac running macOS Sierra I’ve been using GraphicConverter 11 and it’s not without its quirks, some of which I’ll share with you today.
If you are on Microsoft Windows I heartily recommend using irFanview* because it’s a full-featured, mature program, If you use macOS, you are stuck with GraphicConverter although if you have a newer computer with the latest OS and using version 12 of the software it may be less problematical for you than version 11 that I’m using on my old computer. If not, here’s some tips:
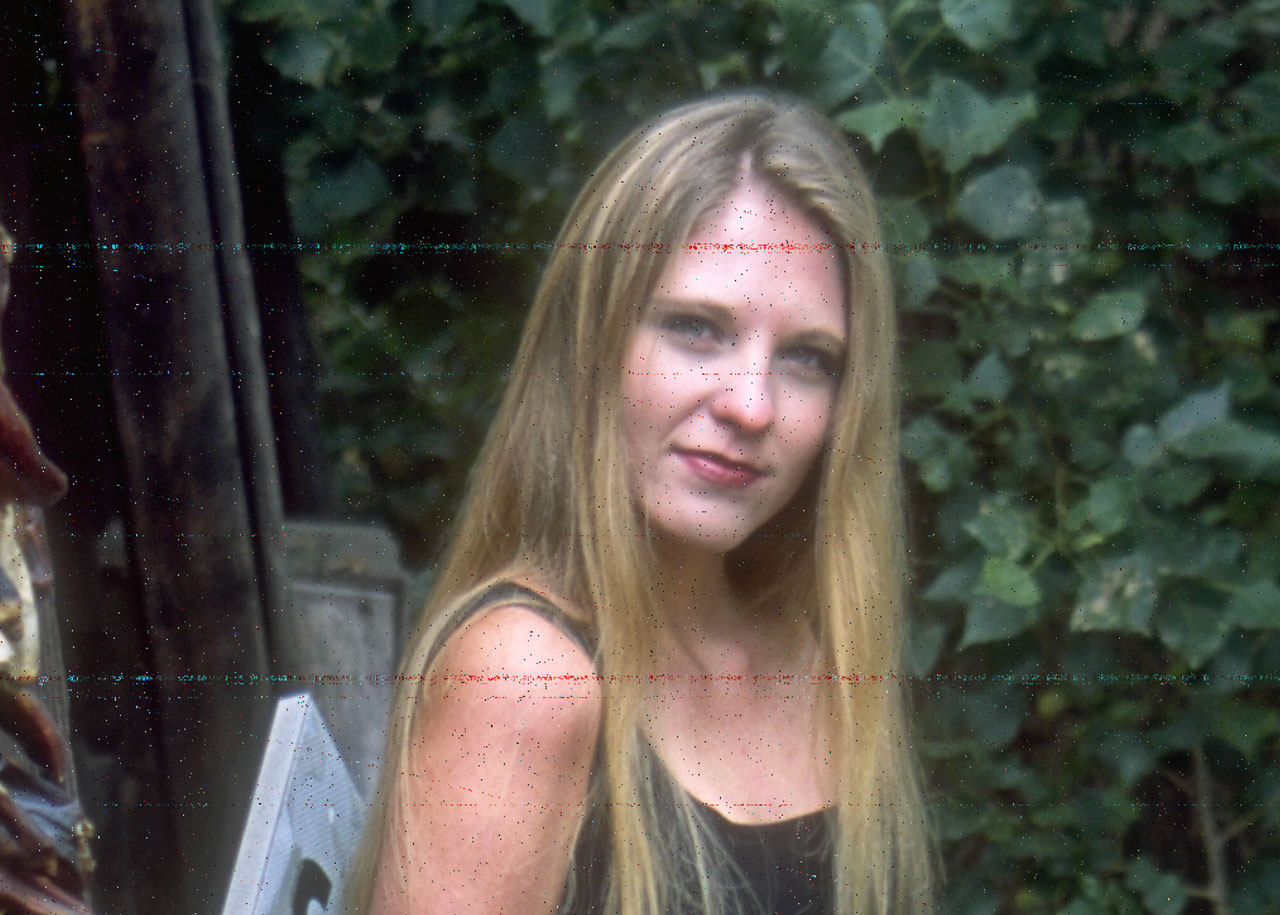
 GraphicConverter has a non-intuitive blank page look with all of its commands hidden behind a seemingly complex system of menus, sub-menus and sub, sub-menus. After selecting the Images folder from the Photo CD disc, the Browse command (File>Browse) will open an interface similar to Adobe Bridge, and, like Bridge, other types of views are possible so you can pick one you like. Your first thought might be to double click on one of the PCD files that are displayed as thumbnails and save it in another format. Don’t. If you do, you will end up with a low resolution file that’s covered in scanning artifacts as can be seen in a portion of the image file above left.
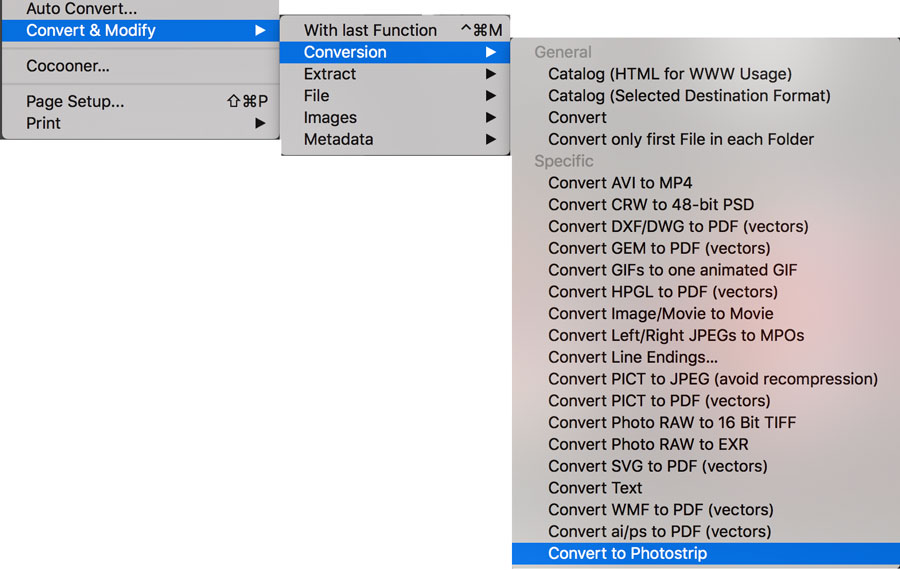
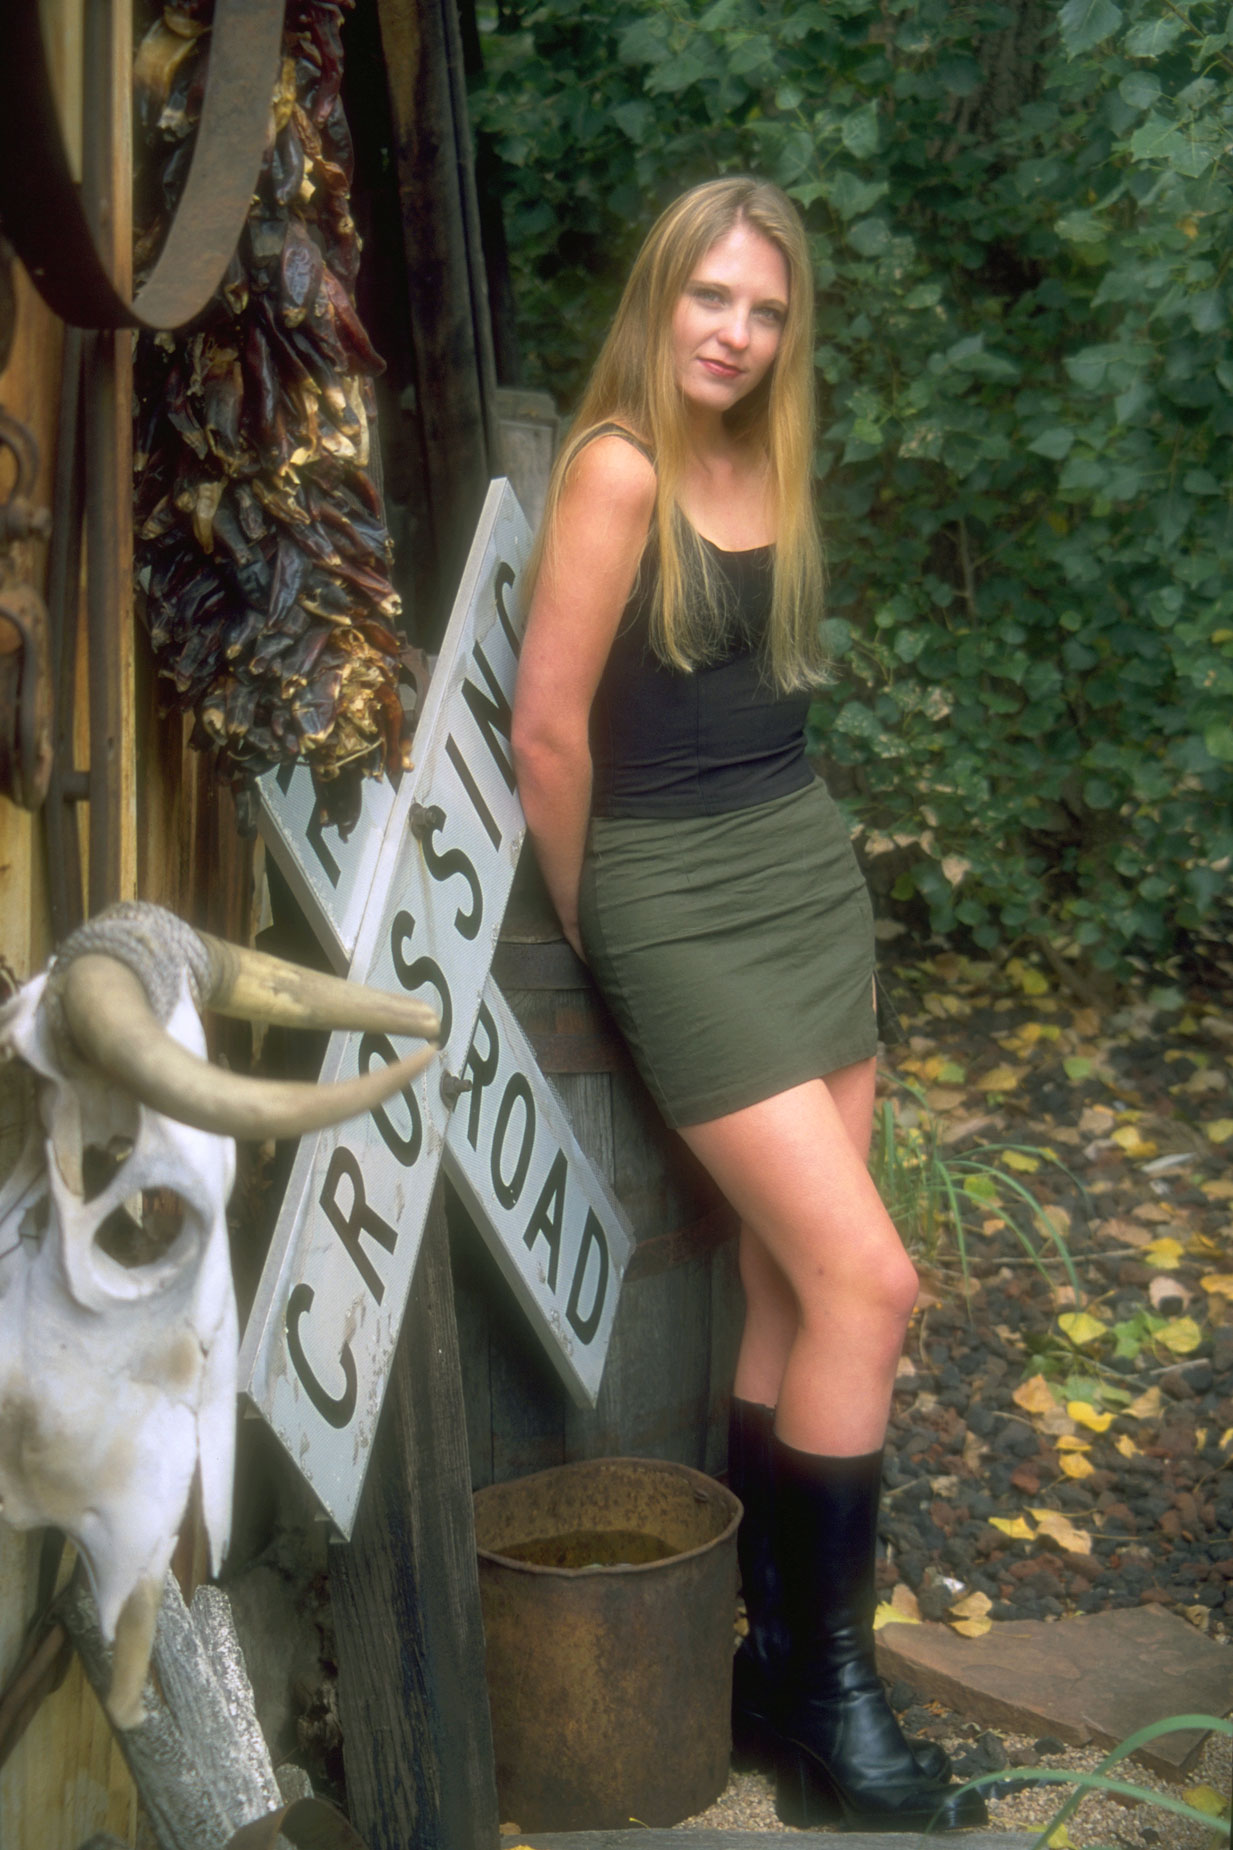
Instead, while in Browse mode go to the File menu and try this menu tree: Convert & Modify>Conversion>Convert to Photostrip but, to tell the truth, it doesn’t seem to make a difference what final menu option you use, at least on my computer. This will open a pair of confusing and adjacent widows displaying thumbnails. (I haven’t yet figured out what the left-hand widow is for.) Look in the right-hand window, double-click the image file you’re interested in and click the Save icon in its image window to save the file as a PSD file. That’s what I did with the image file at left.
 How I Made this Photograph: I photographed this model who had been referred to me by a local modeling agency back when I had a relationship with a local modeling agency. If you’re lucky, this approach for finding models might work for you. Please note this image was not made at a real railroad crossing, something I discourage photographers from doing for lots of reasons including safety but also creating trespassing problems. Yet this genre seems popular on social media. Instead, this portrait was made outdoors in a photographer/friend’s outdoor portrait garden that’s adjacent to his studio. He was kind enough to lend it to me but I could only use it on Sundays because it was otherwise in use by him or one of his photographers.
The camera used for this available light portrait was a Contax 167MT. I recently purchased another 167MT with a P5 battery grip that uses AA batteries providing faster fps and longer life than the AAA batteries the camera typically uses. The lens was a Carl Zeiss 50mm f/1.4 in C/Y mount. Film was Kodak color negative and the exposure was unrecorded. After processing, the film was scanned using Kodak’s Photo CD Process. The file conversion was far from perfect but after minor color corrections with PictoColor iColor Portrait I used Vivenza to slightly lower the contrast while punching up the saturation, again slightly. To take off the edge of the image, I used the Glamour Glow filter from Color Efex.
Update: GraphicConverter 11 does not consistently handle images from Kodak Pro CD discs. The Pro version disc only contains 25 (6144 x 4096) images and, according to Kodak, is “appropriate for 120 film, 4×5…” film.
*for a time Kodak flirted with the FlashPix file format and made Flashpix discs, much like Photo CDs. FlashPix is a bitmapped computer graphics file format that’s based on the IVUE format, the tiled/multi-resolution image file format used by Live Picture software, a company headed by John Sculley after he left Apple. The good news is that IrFanview will also translate and convert FlashPix files, so that’s another reason, if you’re using Windows, why it’s a superior product.

If you enjoyed today’s blog post and would like to buy Joe a cup of Earl Grey tea ($2.50), click here. And if you do, thank so very much.
My book Available Light Glamour Photography that is available from Amazon with new copies selling for $29.95 and used copies starting around twenty-five bucks as I write this. Kindle copies are $28.07 for those preferring a digital format.